Monsterfy This: Part Duex
19Revenge of the Crackled Horror Doll
While working on some new projects I decided to do another Monsterfy This.
I am going to show you how to do this Doll… I call her Oozy Suzy.
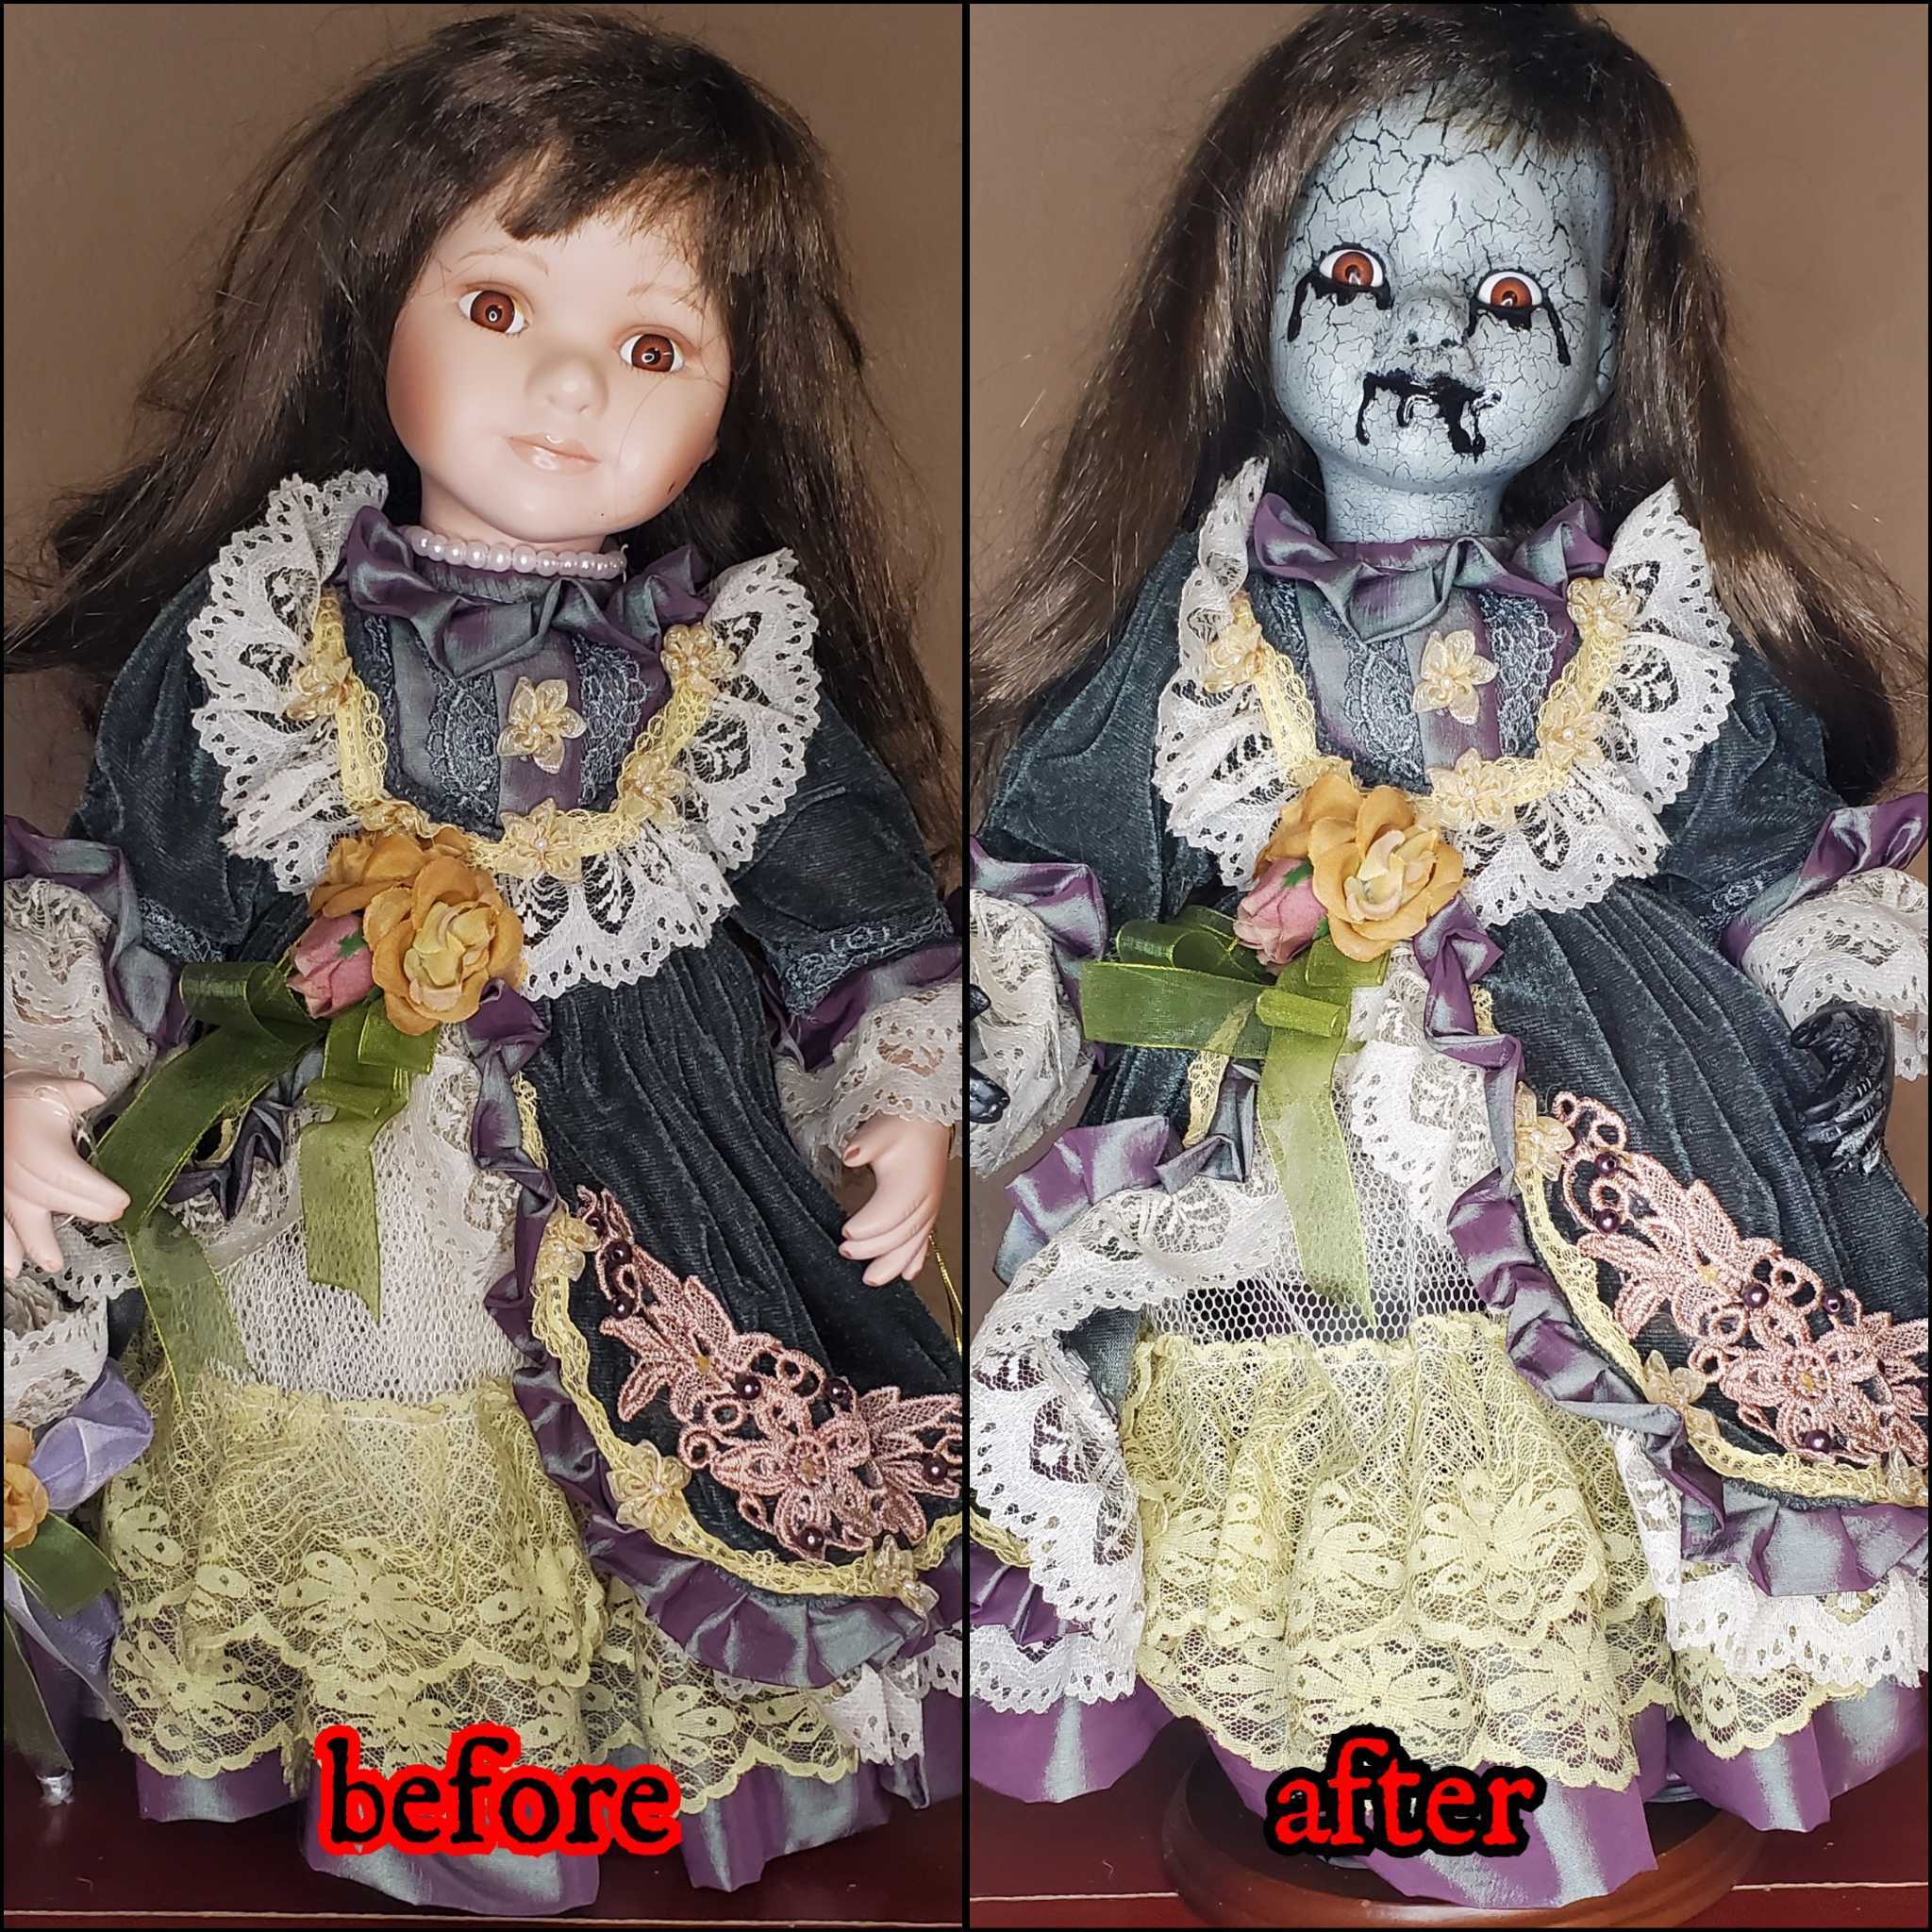
I am going to attempt to show y’all how to use Crackle Medium on a horror doll repaint. Using Crackle Medium when painting creates a distressed look that I feel can up the creepy factor significantly. It took so much trial and error for me to figure out how to apply it effectively and not too many horror doll makers share how they do it… so I want to remedy that and hopefully make it easier for anyone who wants to try it. I am also going to show y’all how to incorporate 5 min 2 Part Epoxy to create drool and tears.
What you need to get started:
A Porcelain Doll
Rotary tool with sanding bit and or Sandpaper
Dust mask and eye protection to use when sanding
Detail paint brush
Soft straight edge paint brush for blending
Soft wide paintbrush for covering large areas
Soft “Mop” style paintbrush
Black Acrylic Paint
A mix of matte acrylic paints or a lighter tone paint for the top layer that will become crackled.
Crackle Medium (You want to use the type that goes on in-between paint layers… I have only ever worked with Folk Art Crackle Medium… I feel it works the best)
Mod Podge Matte
High Gloss Acrylic Varnish or Mod Podge Ultra Gloss (I used Liquitex High Gloss Varnish Acrylic Medium)
5 Minute 2-Part Epoxy (any brand will work… I prefer Gorilla Brand because it dries super clear)
Tooth picks
Glue gun (high temp if possible… low temp works but does not bond to porcelain as well)
Hair Dryer if you are impatient like me
Scrap piece of cardboard, Paper towels and/or craft paper
Step one:
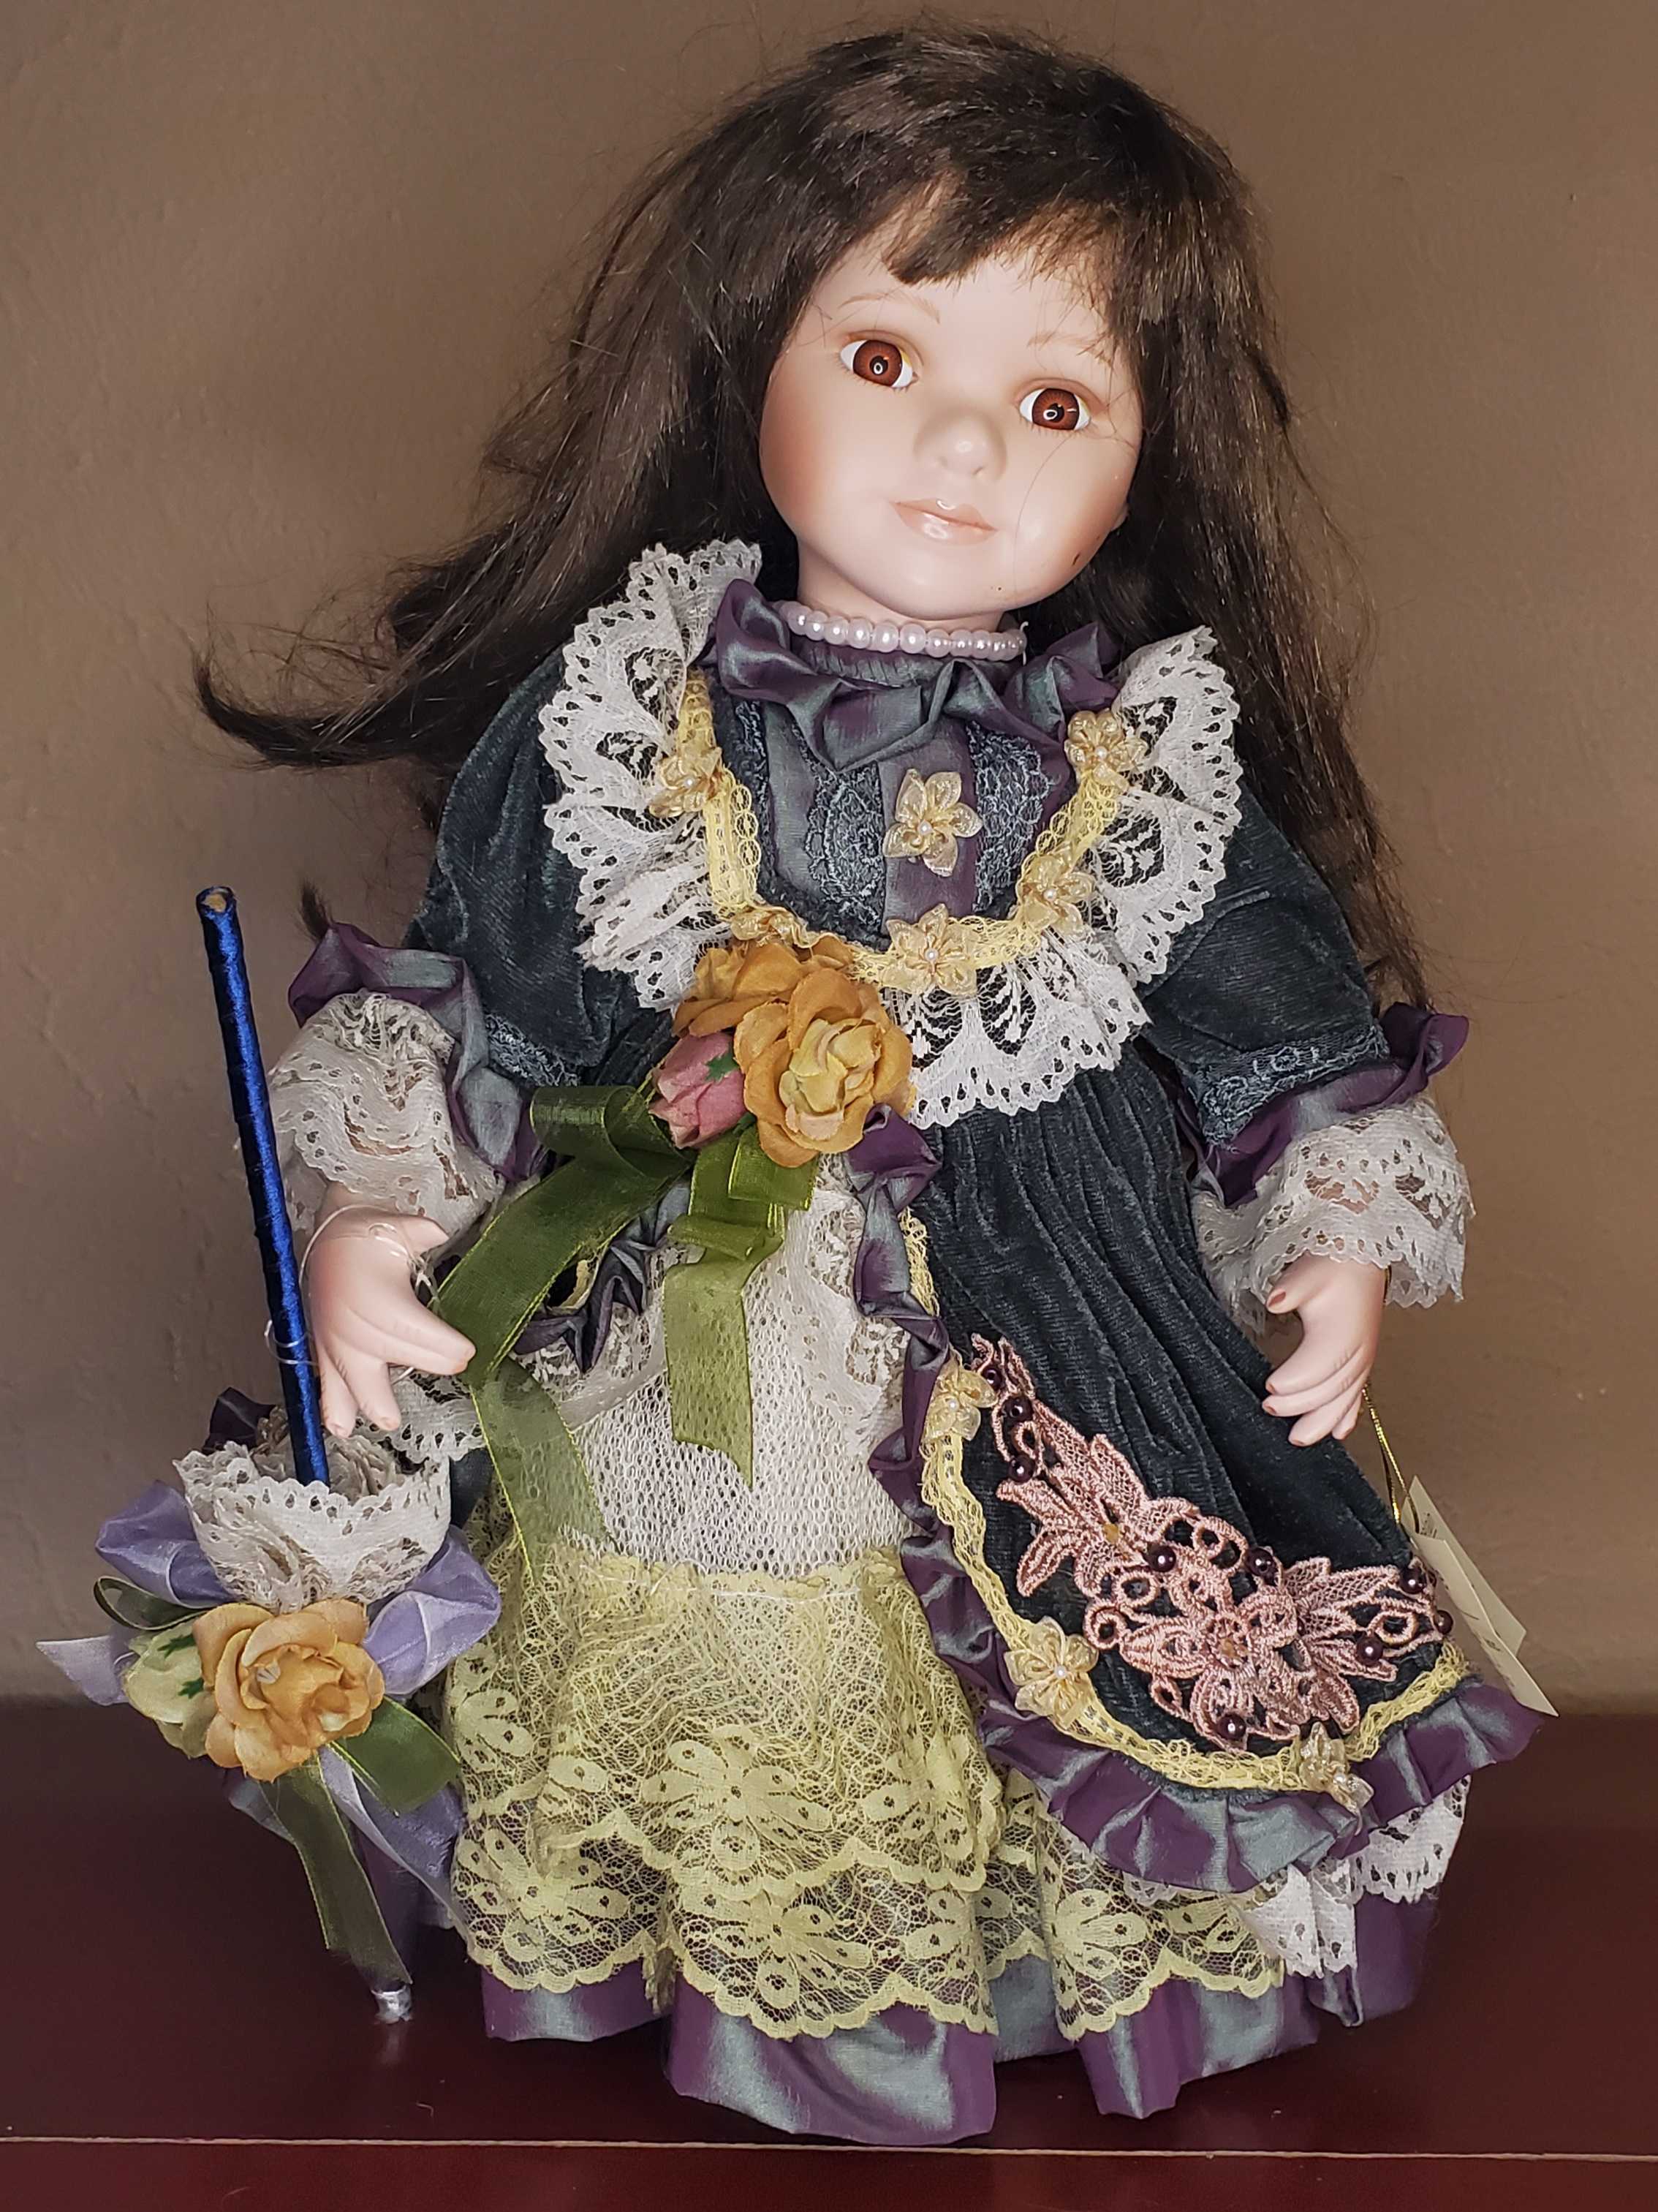
Find a porcelain doll… I chose this one because I wanted to keep the outfit but did not want to have to alter it or dye it… The dress this one has I felt would work well with the crackled paint job.
Step 2:
This part will sound familiar…
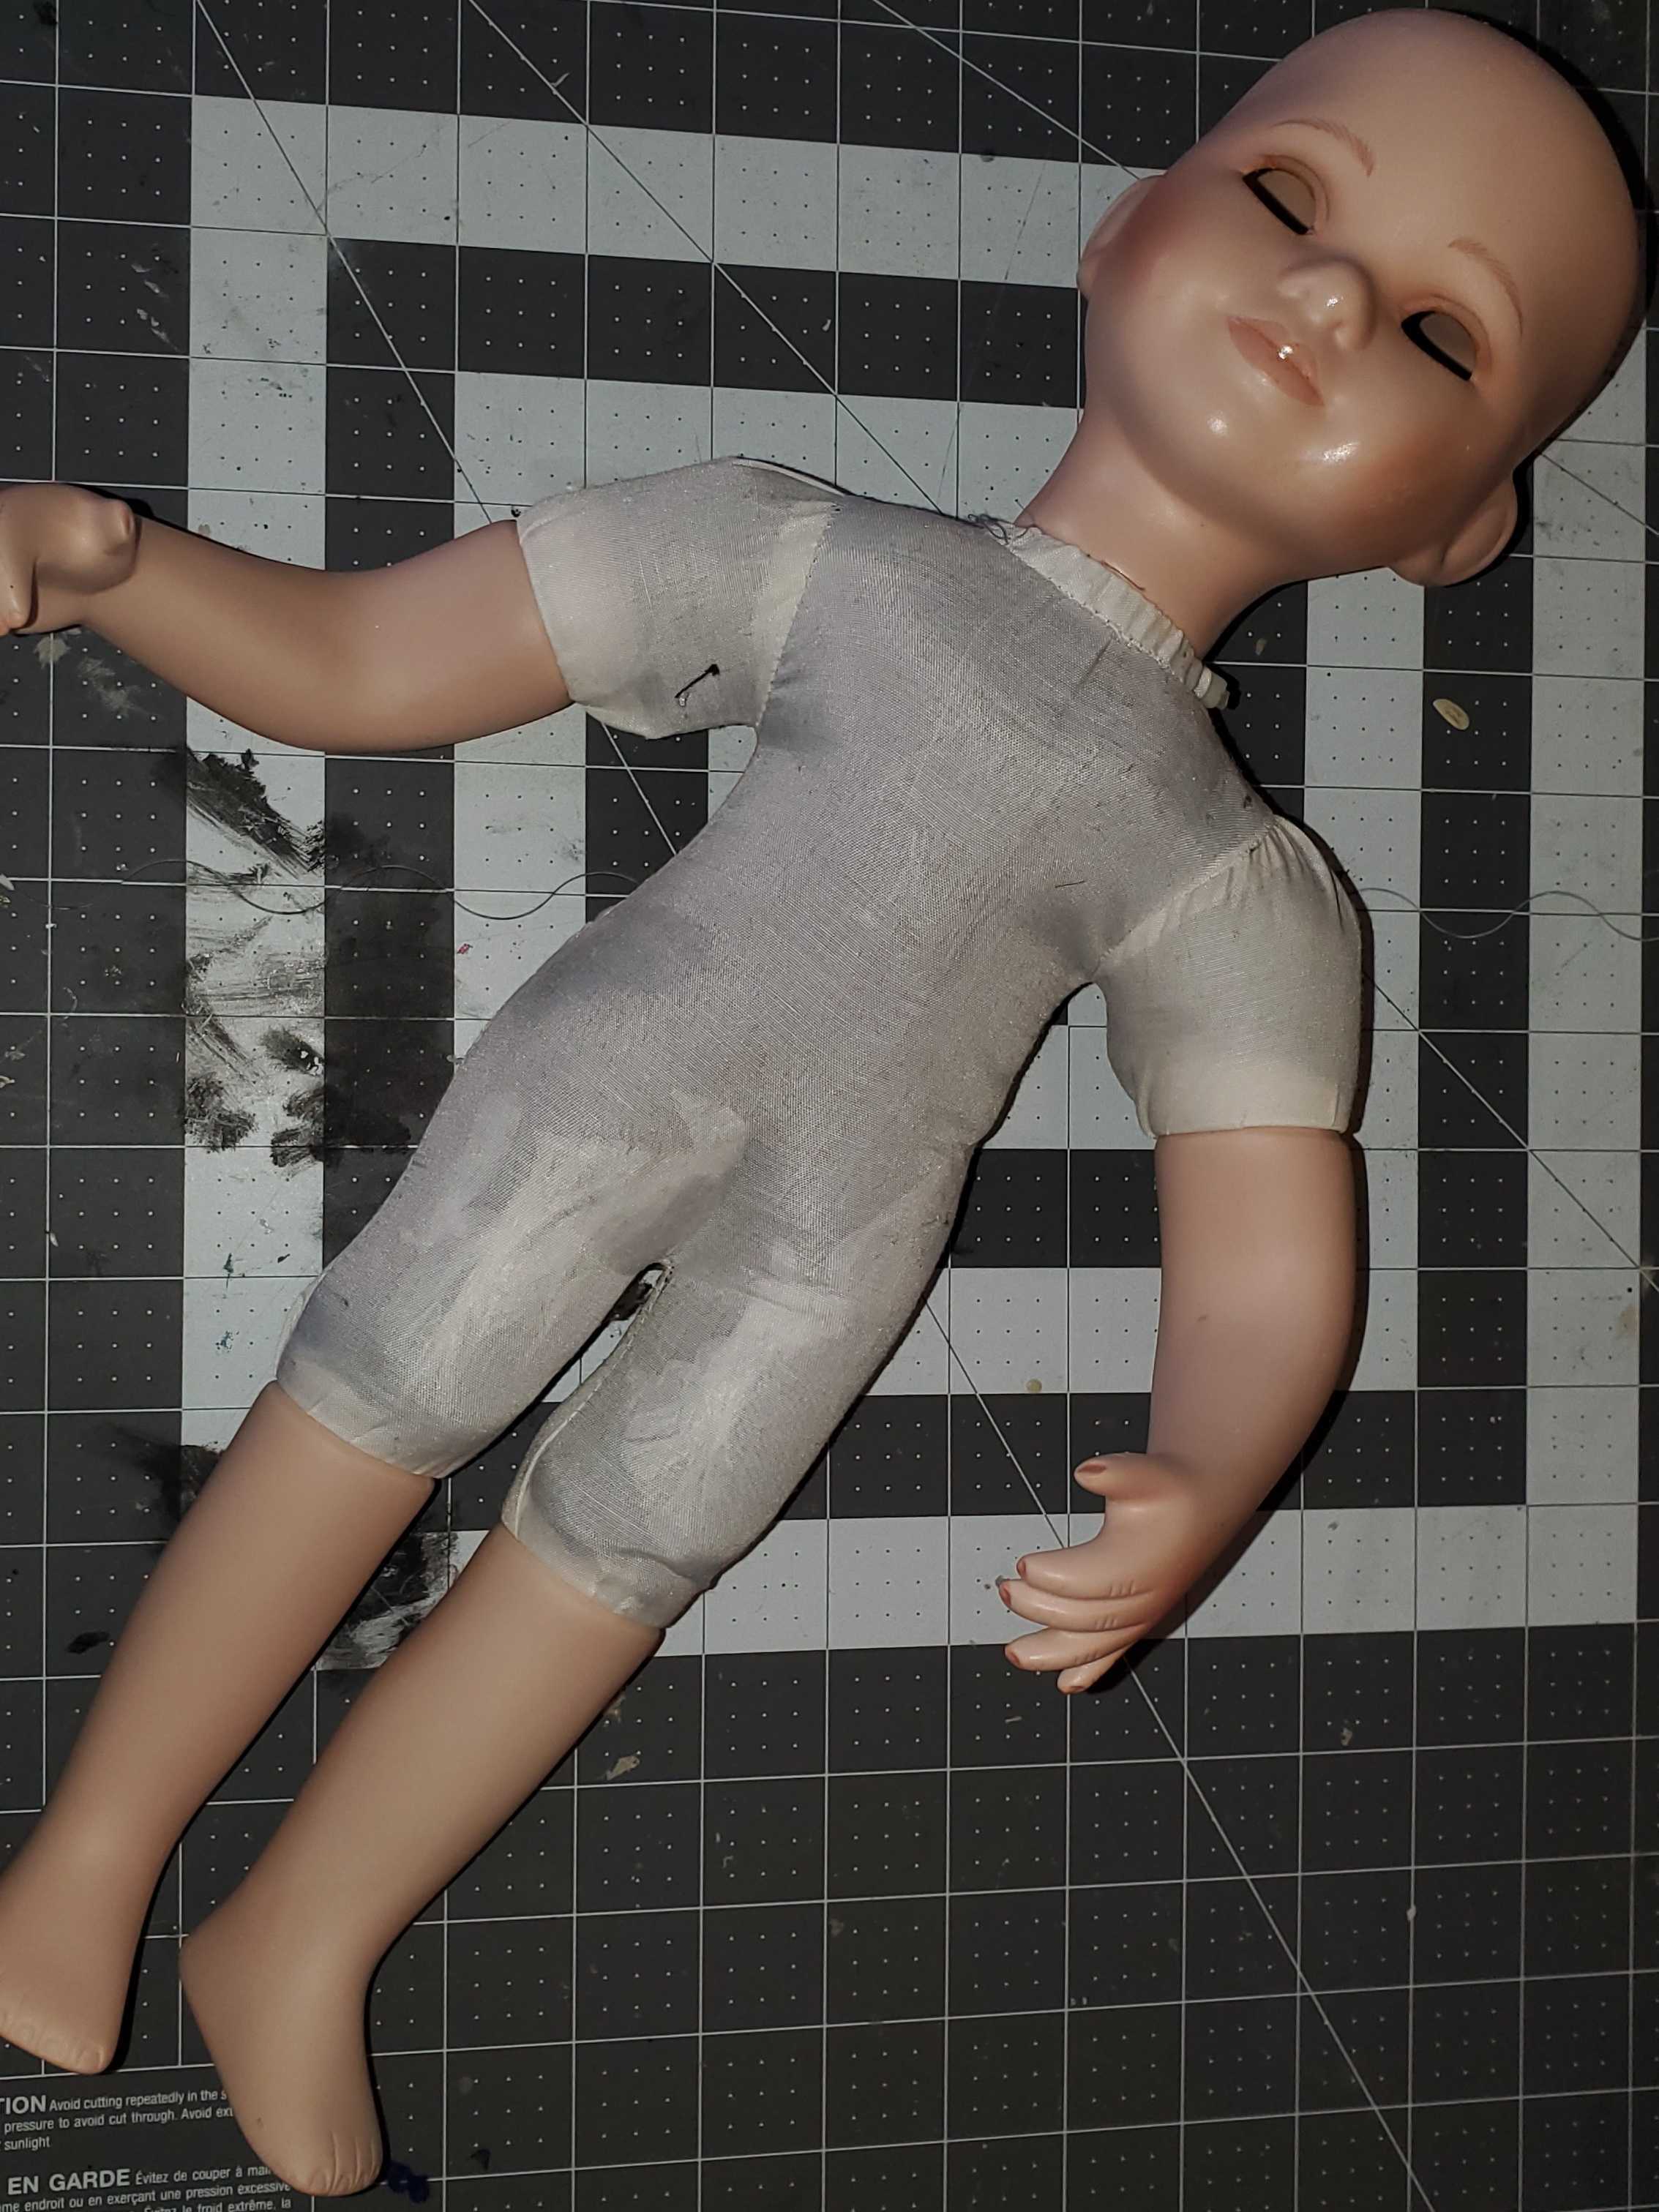
Dismantle all of the accessories, outfit and remove the hair (I removed the eyes too because I was going to swap them with some glass eyes but decided in the end not to so you don’t have too). Removing the hair can be a bit of a chore. If you want to keep it you will need to remove as carefully as possible so you do not damage the wig. Most if not all porcelain dolls have wigs that are glued down. Carefully remove the hair and top cap from the head… normally you can just peel it back from the forehead back and it will come right off… sometimes the creator went a little nuts on the glue so you have to really struggle with it… just take your time and do it slowly. It will leave bits of hair and glue all over the head. To remove that just take your rotary tool and/or sandpaper and go to town until it is all gone… Make sure to wear your safety mask so you don’t breath in any of the old glue or dust created by the sanding. When you are done you should be left with something similar to this:
Step 3:
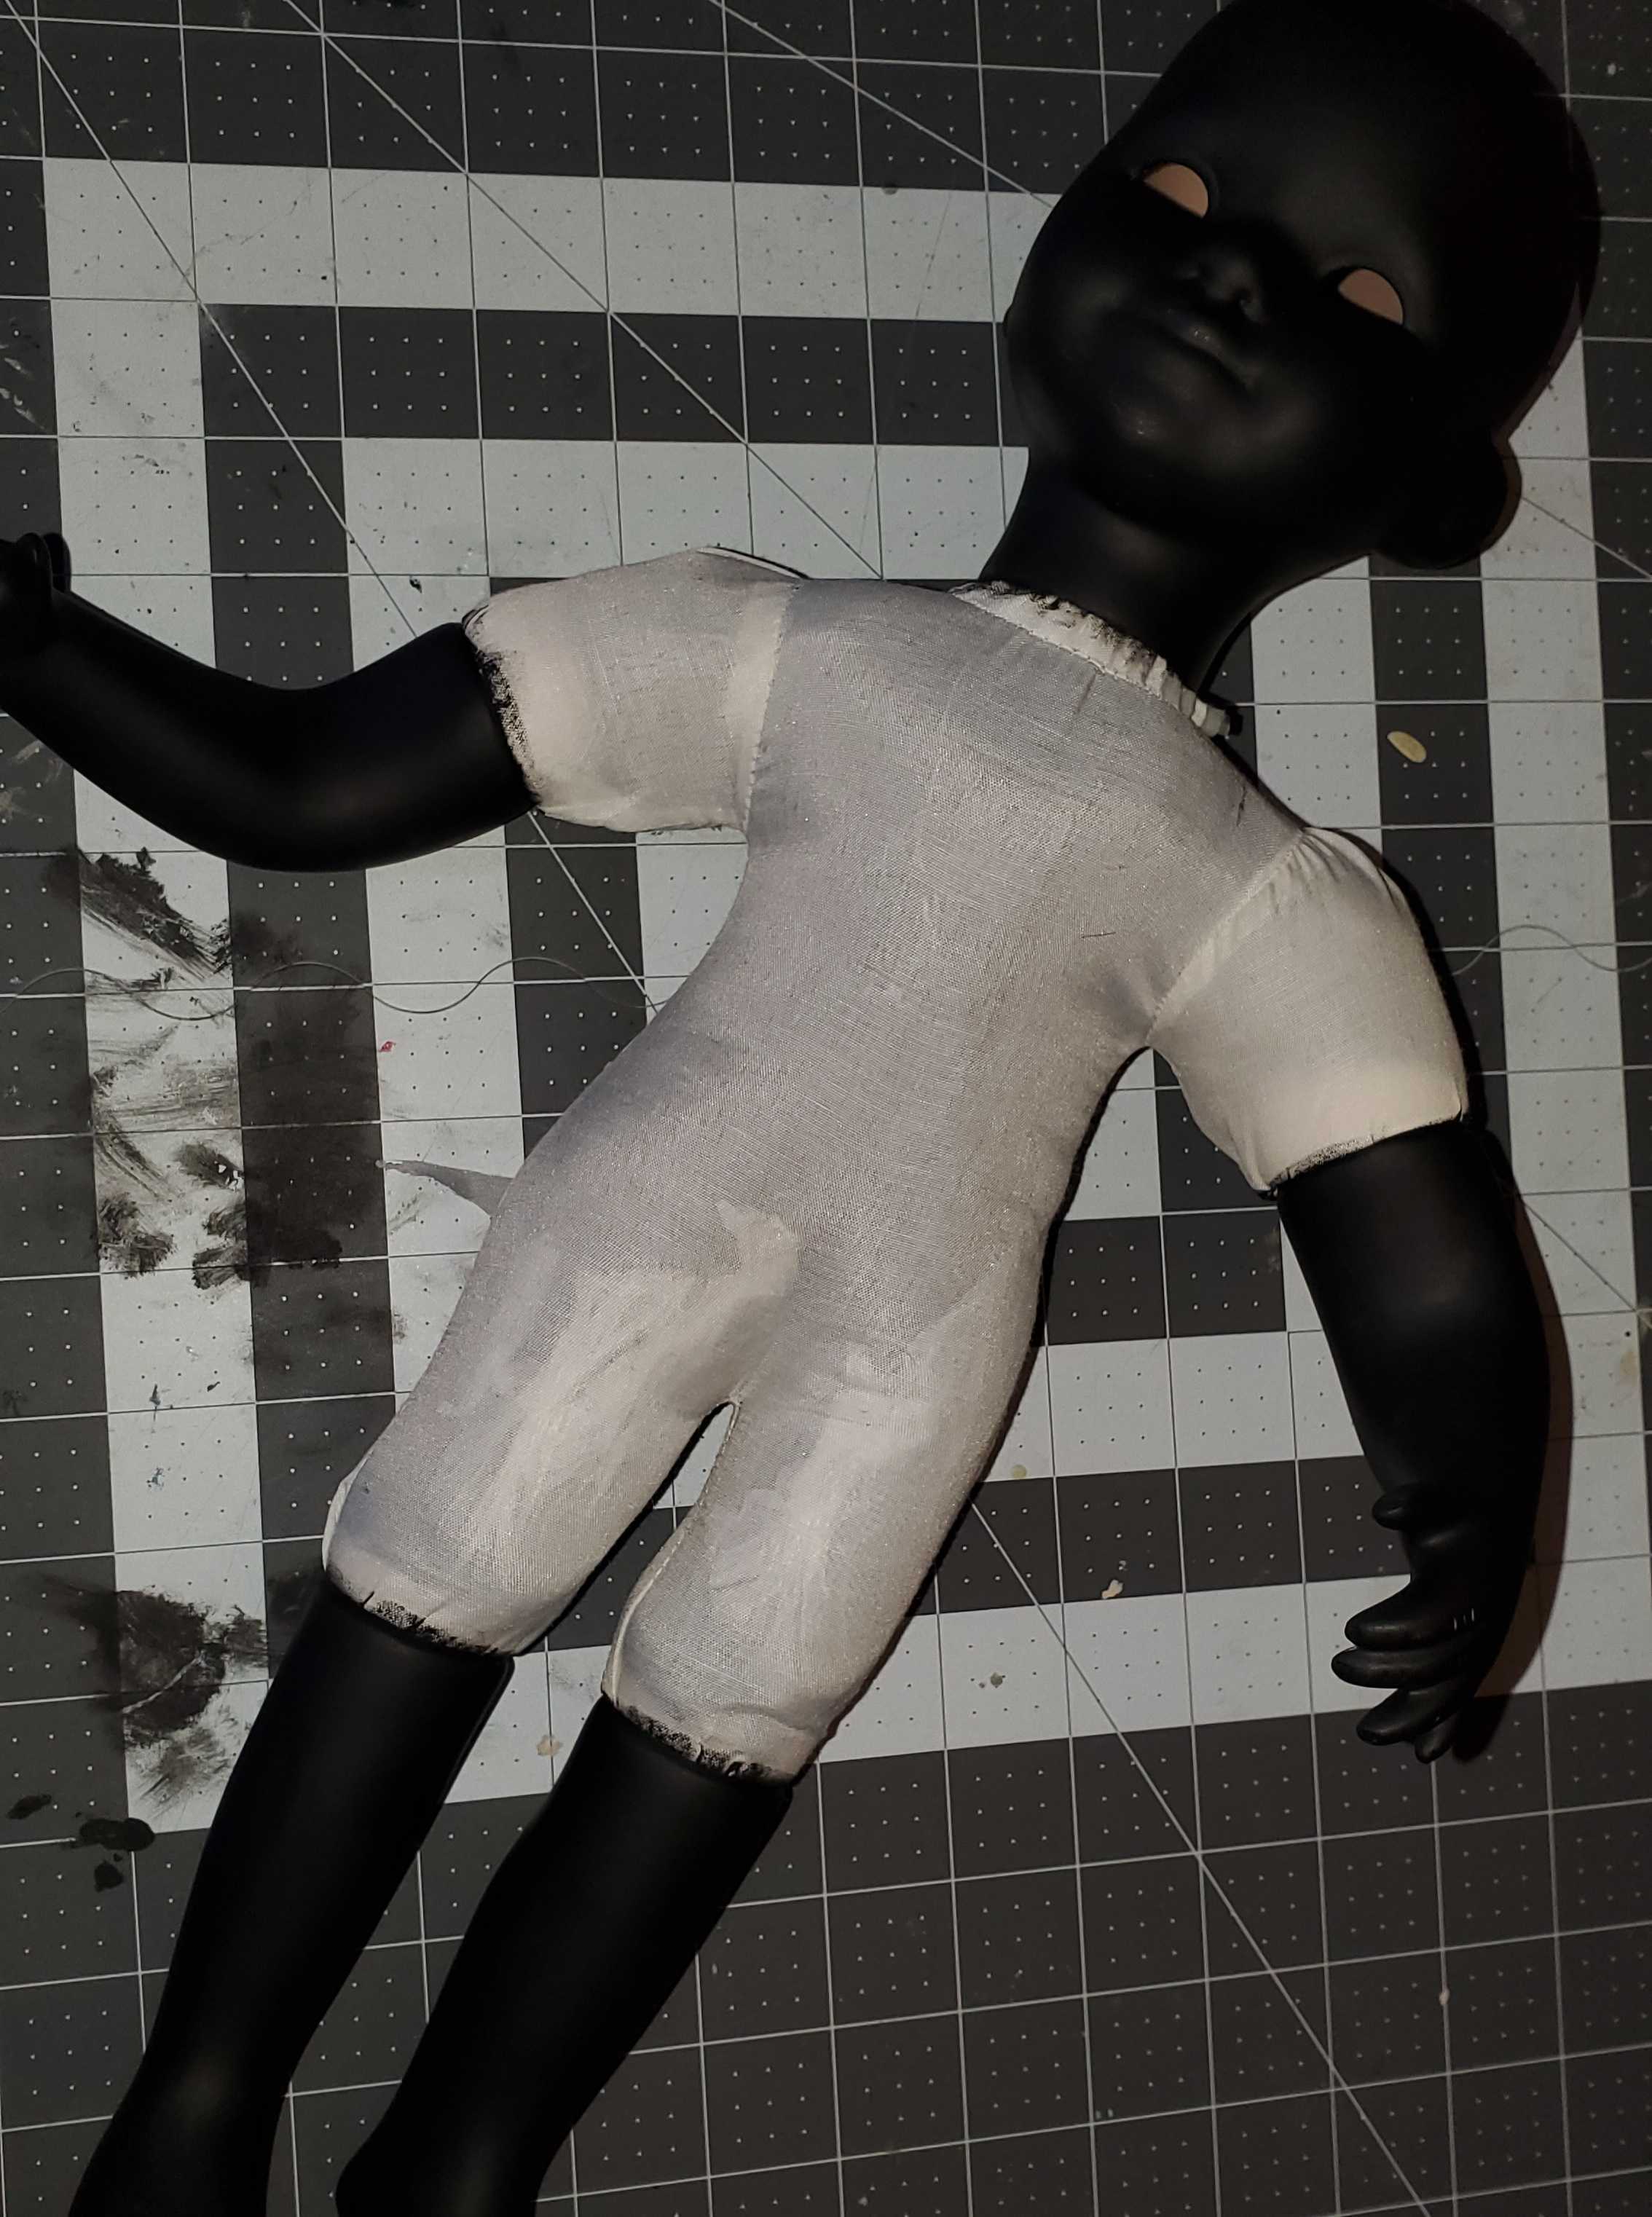
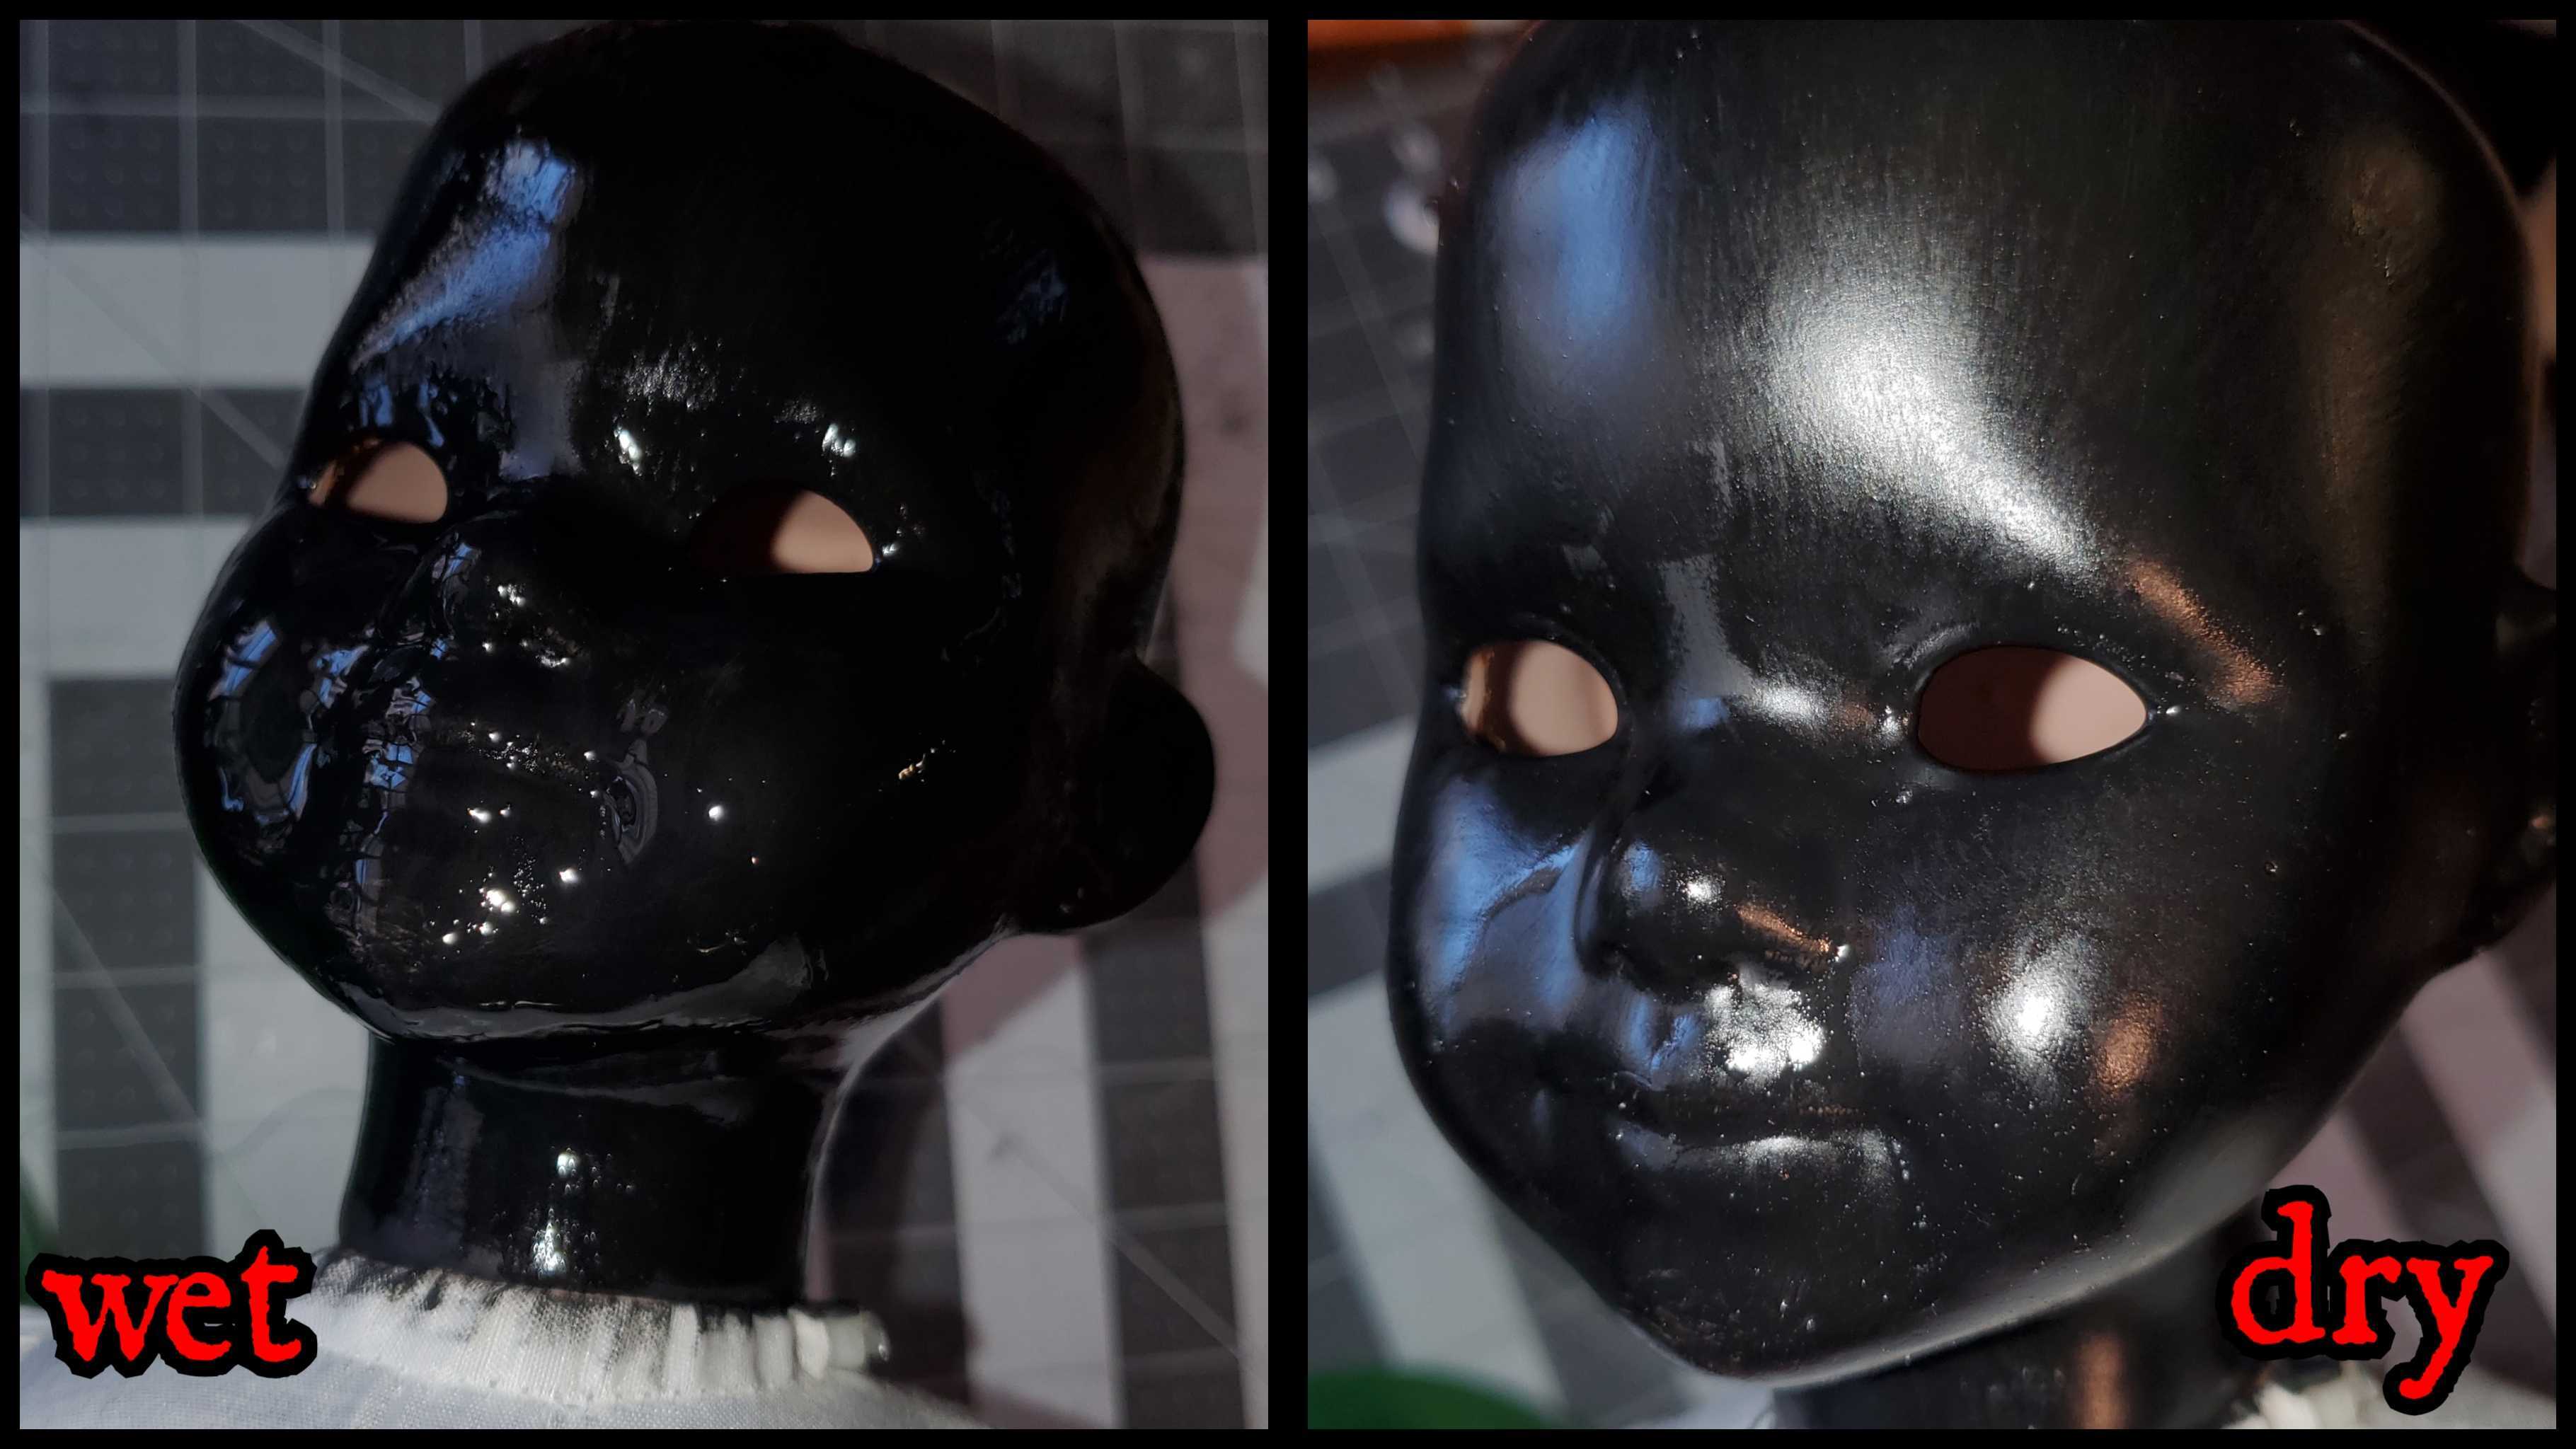
Just like last time… you will paint the porcelain parts of your doll black. This time you will need to do at least 2 coats and make sure you get everything. You can use a hair dryer in between coats to shorten drying time. Crackle Medium works best when the base color is a darker color than the top color so that is the reason you need to make sure it has full coverage:
Step 4:
Using your soft wide paint brush apply your Crackle Medium… This is where it starts to get a bit tricky.
Important things you need to know about applying crackle medium:
Every brushstroke will impact the final crackle effect.
You want to apply the medium using as few brush strokes as possible. Try not to overlap your brush strokes too much. Overlapping can cause visible drips as it dries and will cause the top layer of paint to flake off. Also, apply in only one direction. Do not brush up and and then down over the same area.
The direction of your brush strokes will impact the final crackle effect.
The cracks in the top layer appear in the direction of the brush strokes of the crackle medium. So it is important to keep a consistent pattern of brush strokes when applying the medium.
The amount of medium applied will impact the final crackle effect.
The thicker the application the larger the cracks. If you want smaller cracks apply less medium if you want larger cracks keep it thick. I personally like to have a combo of both. I find smaller cracks look great around the facial features. Larger cracks look good over larger areas like the forehead, cheeks, back of the head and neckline. If you apply it thick and go back over it a couple times in the same direction it will thin the application down and create smaller cracks. If you apply it too thick however, it will cause drippings as it dries which will cause the top layer of paint to flake off.
How to do it:
When applying the crackle medium begin with the most difficult areas. Start with the area around the eyes. Dip the brush in the medium and start around the eye socket and brush outward about a half inch to one inch (using the brow-line as a guide to know how far to go around the rest of the eye) and repeat all the way around each eye socket. Almost like a sunburst pattern.
Then add slightly more crackle medium on your brush and start at the top of the brow line and brush downward to the chin (making sure the medium gets under the nose and around lips without gaps). Then take about the same amount of medium and start near the end of where the burst around the eyes ends on the cheeks and brush downward to line up with the chin / jawline trying to keep it thicker on the cheeks. Repeat this until you get to the outside edge of each cheek. For the area under the chin go with a thinner application brushing upward from the top of the neck to meet the chin / jawline. Then go a bit thicker over the rest of the head and forehead brushing downward from the top of the head (On the forehead try to thin it out slightly as you brush it where it meets up with the areas you have already done around the face). Finally hit the arms with the medium starting at the top of the arm and brush down to the fingers. I decided not to apply the medium to the legs because I was just going to be covering them up in the end.
You can use a hair dryer if you want to speed up the dry time of the medium or you can let it sit for 24 hours either way works fine. Either way before you can do the next part the Crackle Medium needs to be 100% dry. You can see that when dry it looks like it has streaks running down it.
Step 5:
Time to add your top layer. This part was where I struggled the most… What I have learned is you do not brush on the top layer of paint. You need to use a “Mop” brush (a makeup brush will work but you run the risk of ruining it). You can find “Mop” brushes at any craft store in the area they sell speciality brushes for canvas painting.
So to begin this step you will mix whatever colors you want for your top layer. I mixed up a color that ended up being a light grey with a slight blue/green tint… I thought it looked good against the colors of the dress. You can just find a single color you want to use that is up to you. You just need it to be much lighter than the black base color.
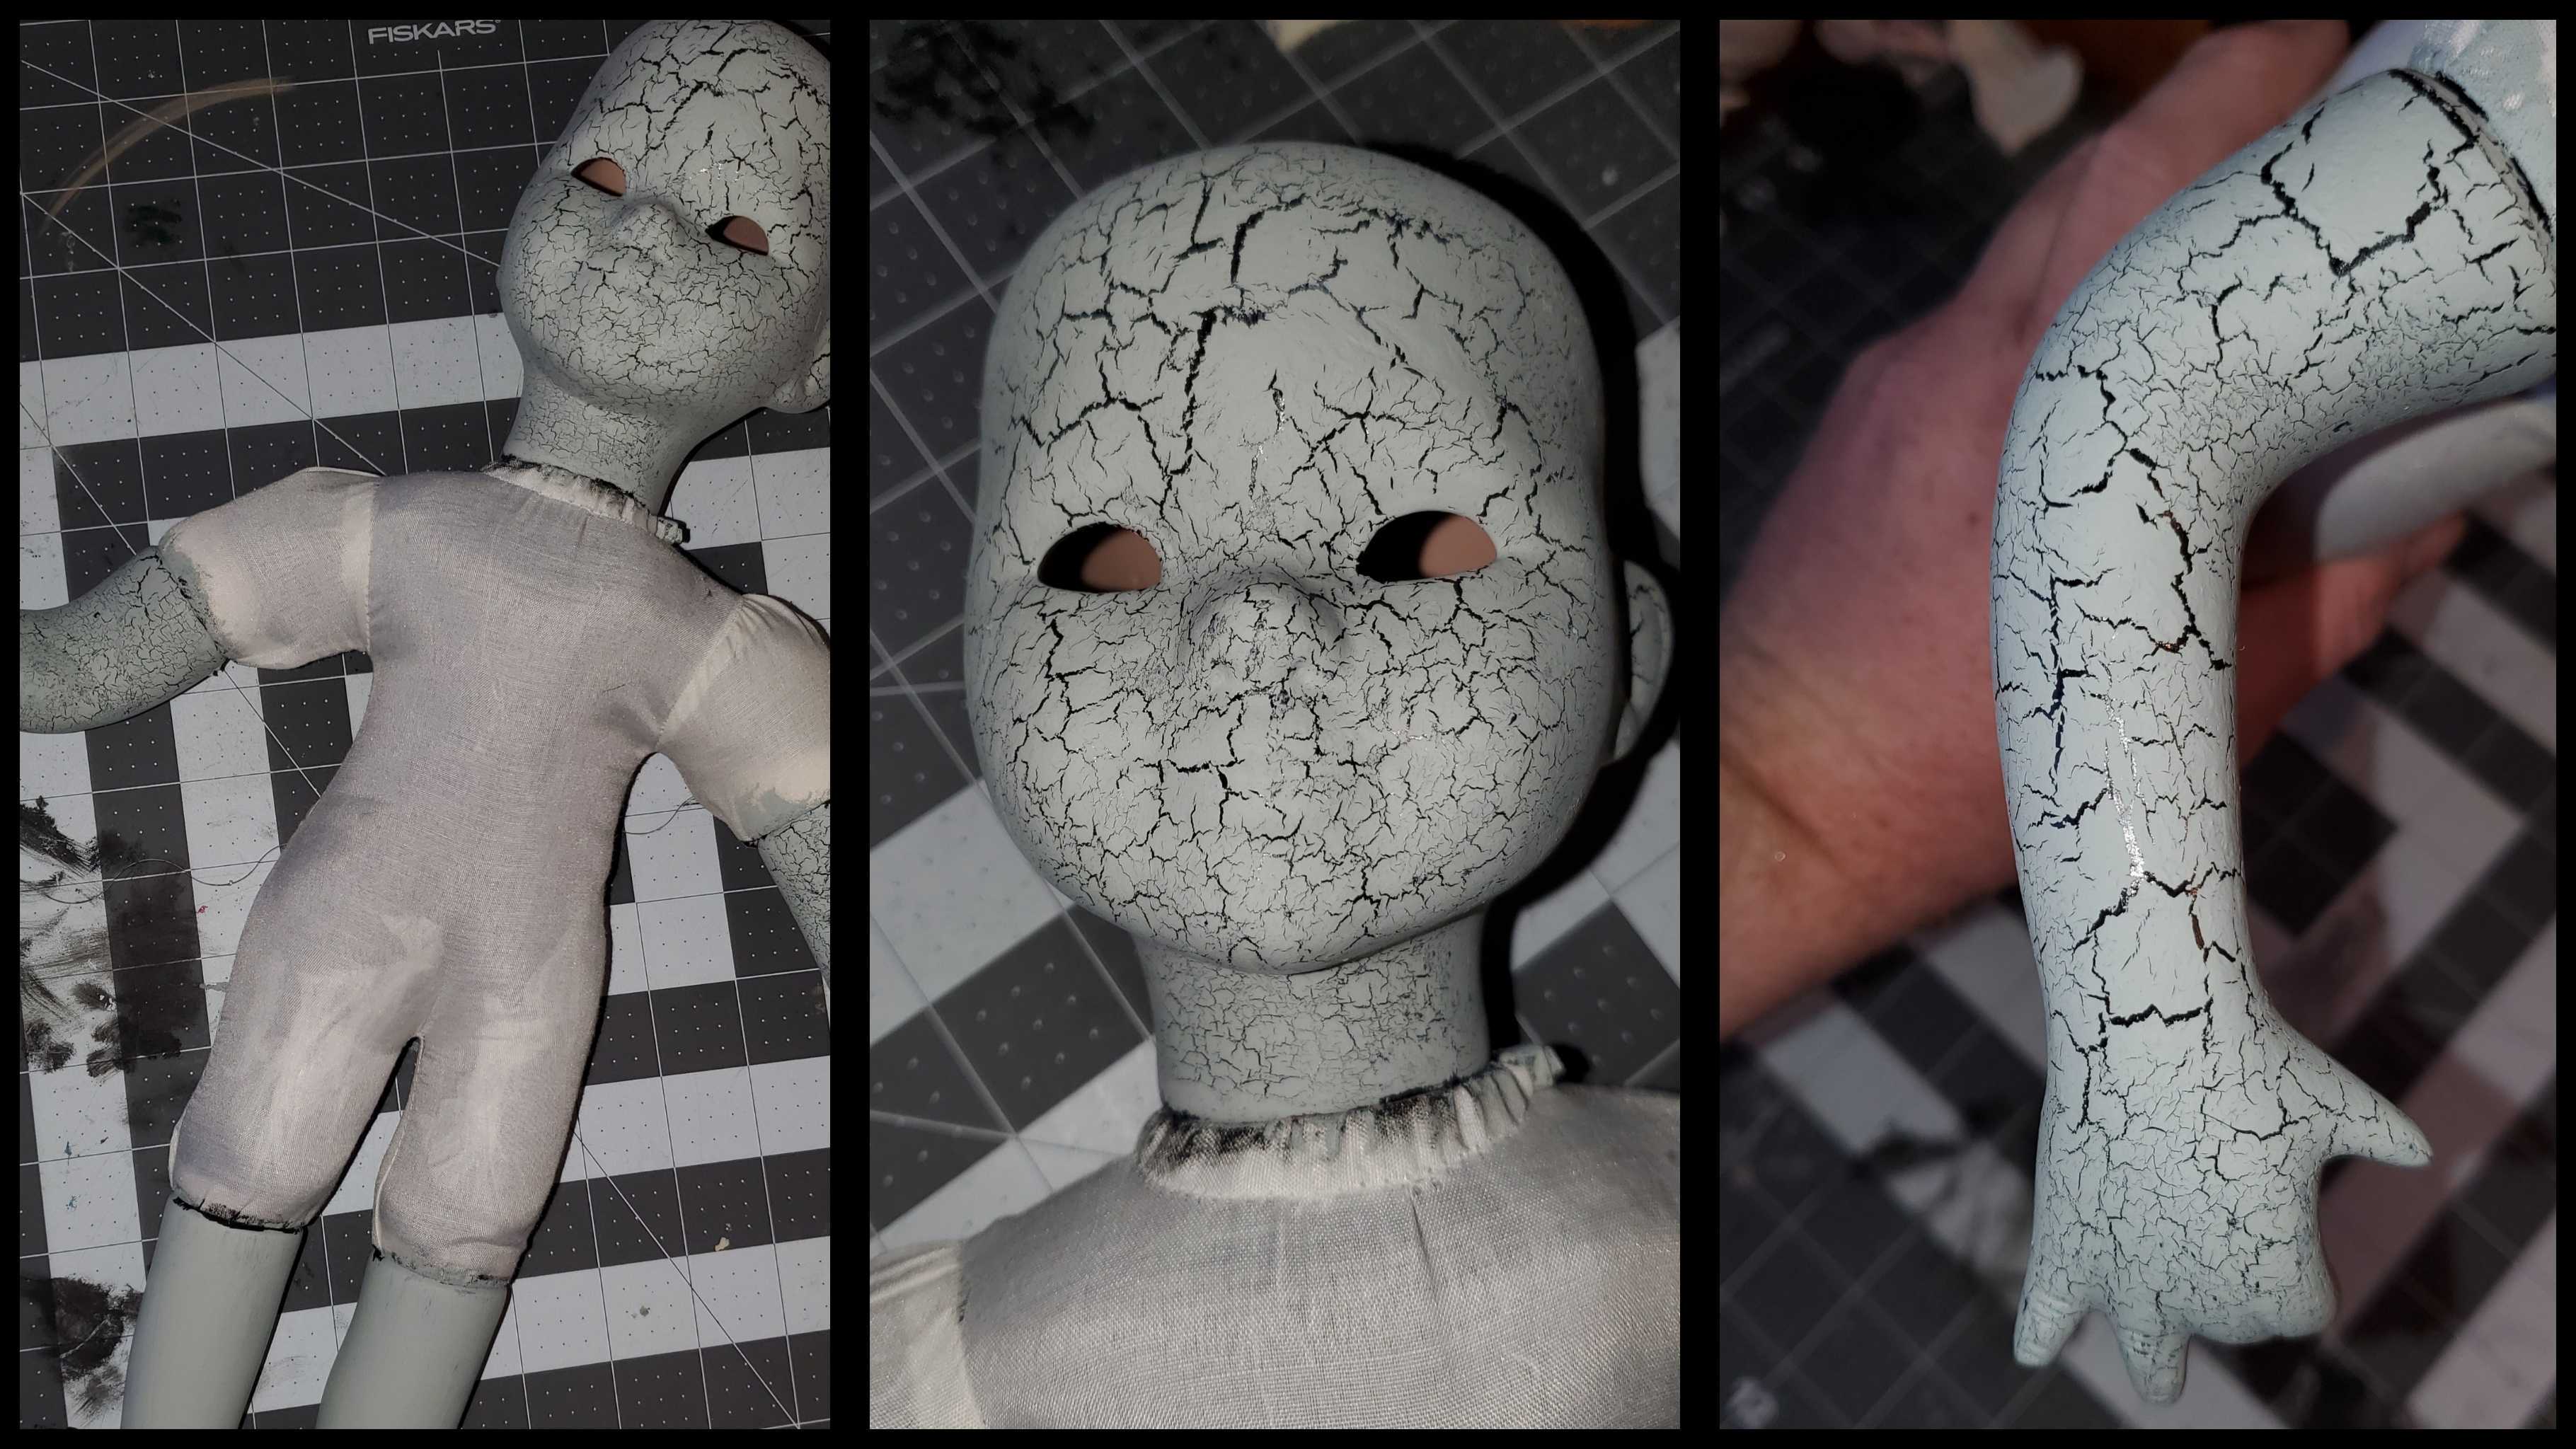
Now you will take your “mop” brush and dip it into the paint. Then you will stamp the brush down against the doll and lift up, move over and stamp again trying to minimize overlap but maintain full coverage. I find I can get 3 to four stampings done before needing to add more paint to the “Mop” brush. As you make your way around the doll it will look messy and look like it is just globbed on, but as it dries the top layer will crackle. Only do one appendage at a time and hit it with a hair dryer on its warmest setting to force the drying process. As it dries the paint will tighten up all of the cracks will appear. Make sure it is good and fully dry before moving on to the next appendage. Because I did not add the crackle medium to the legs I just covered the base paint in the top layer color.
Step 6:
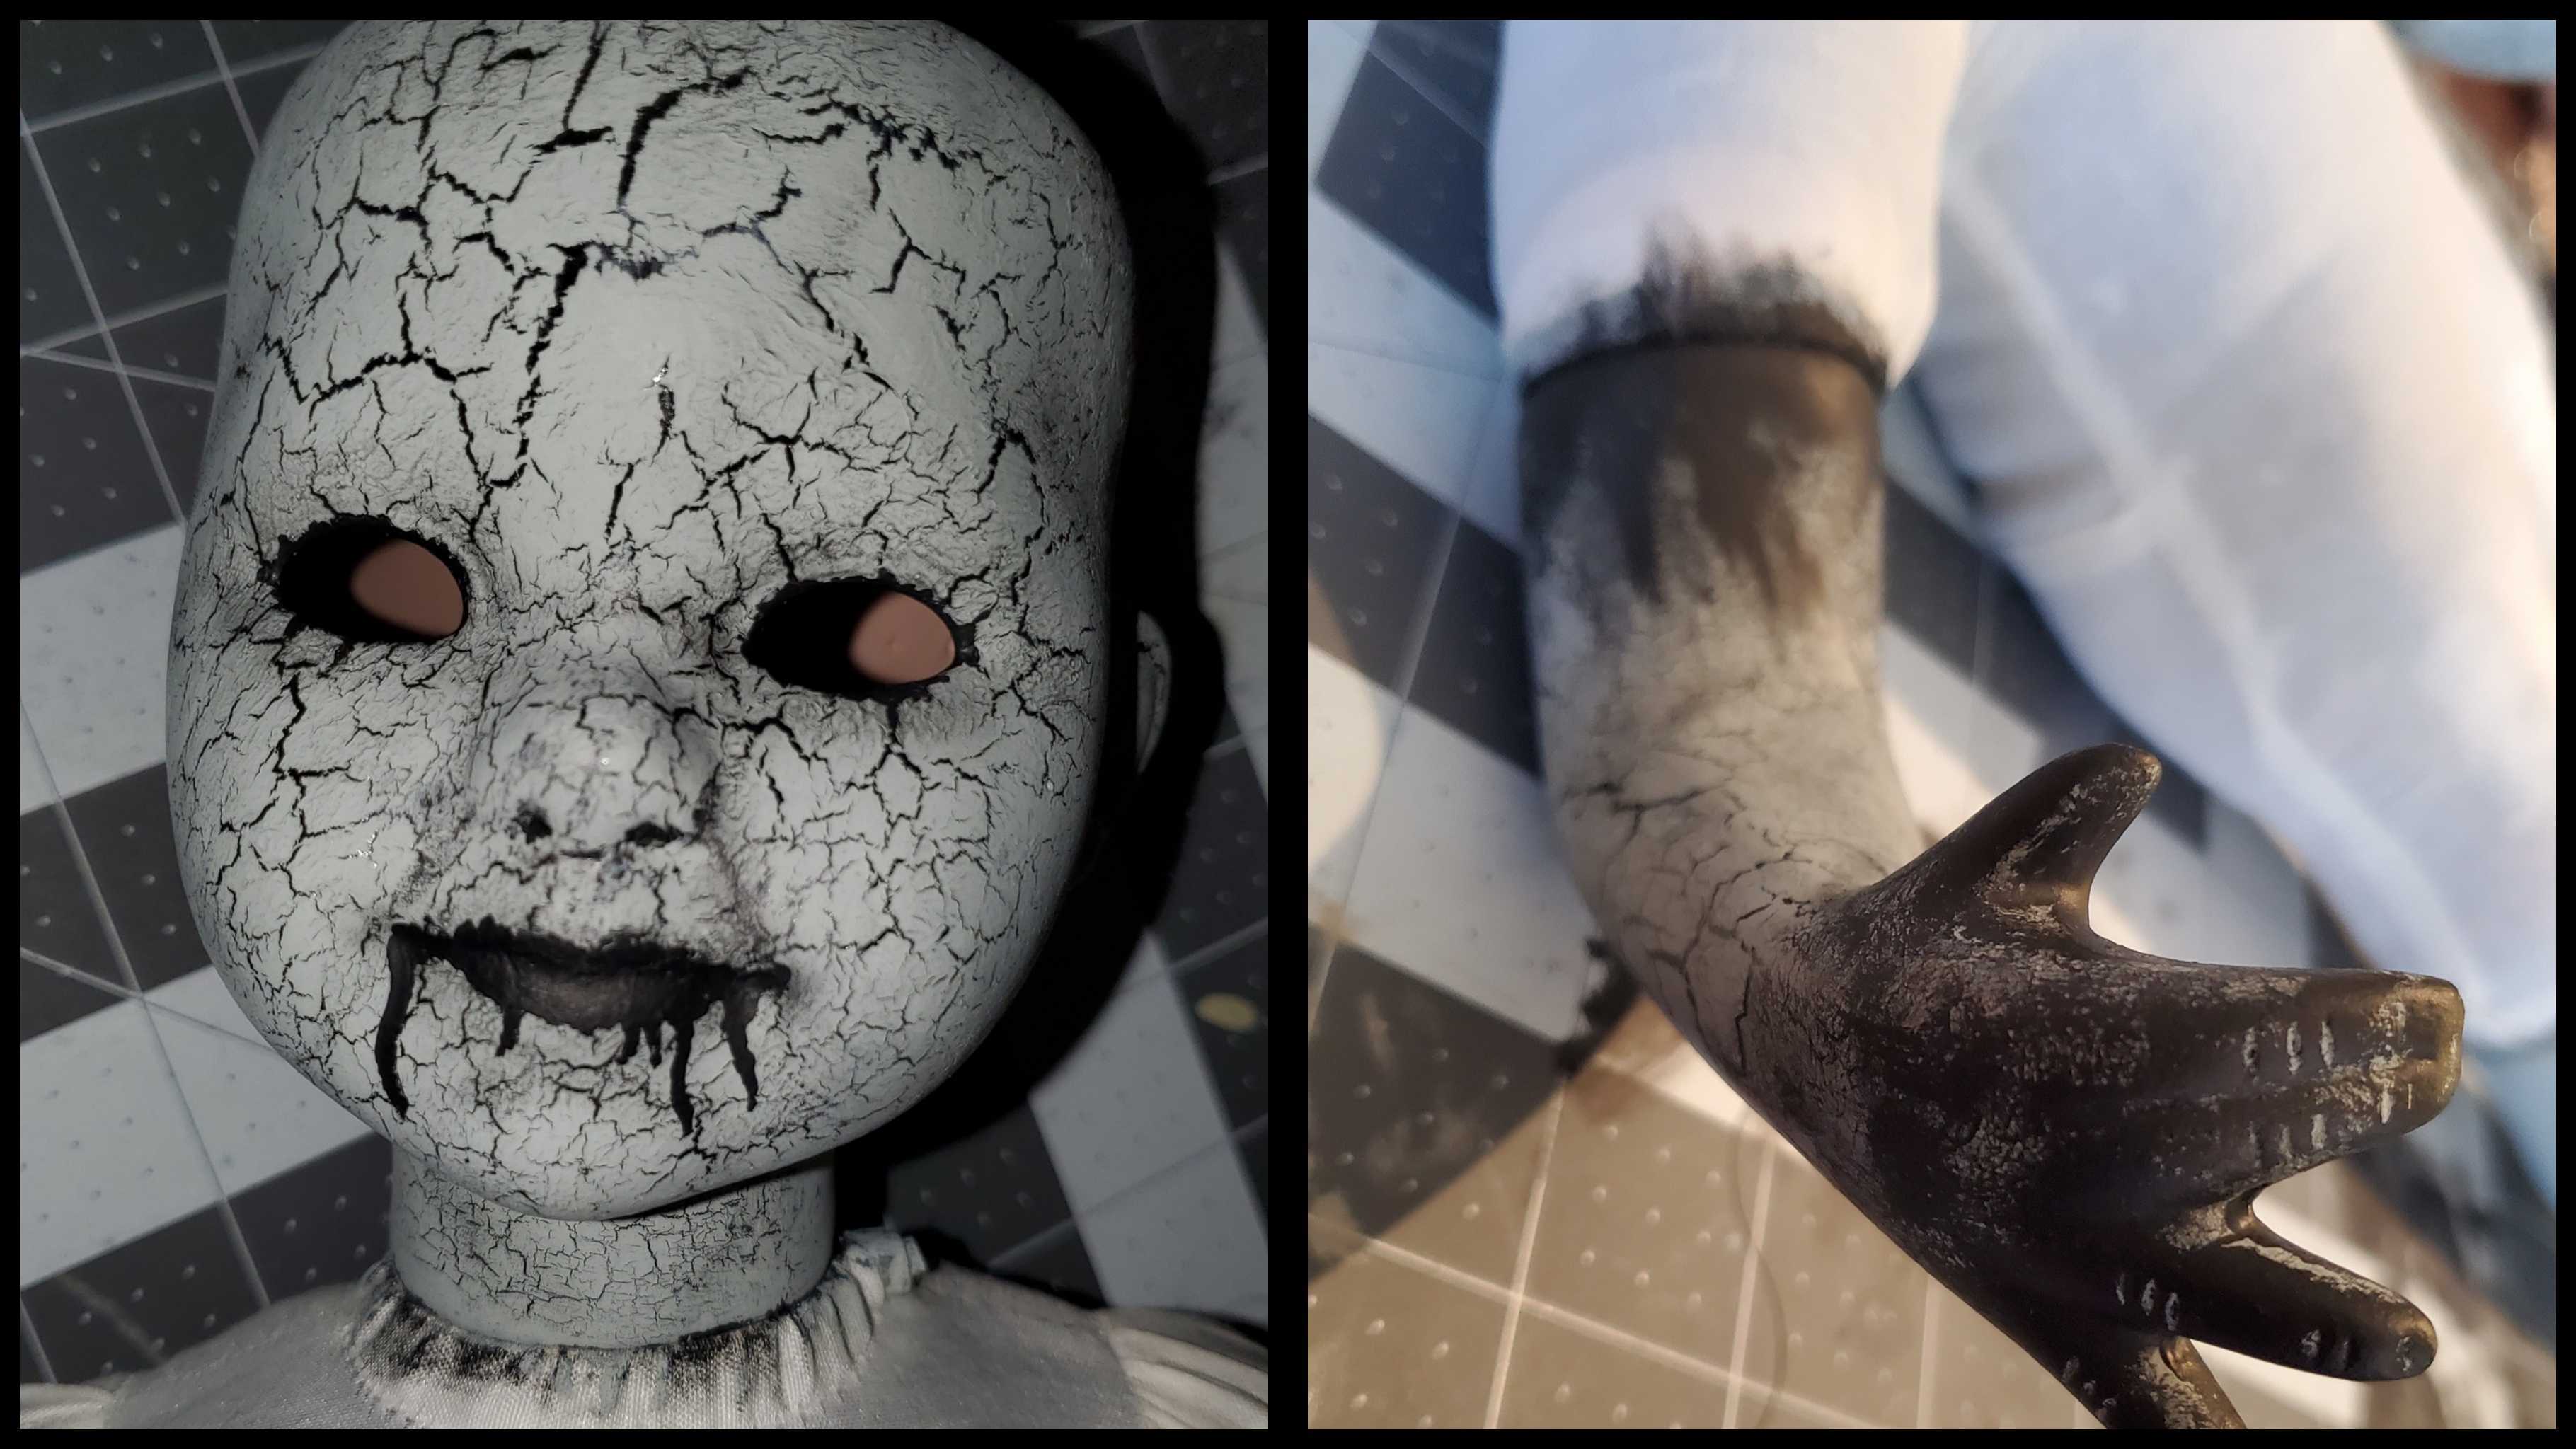
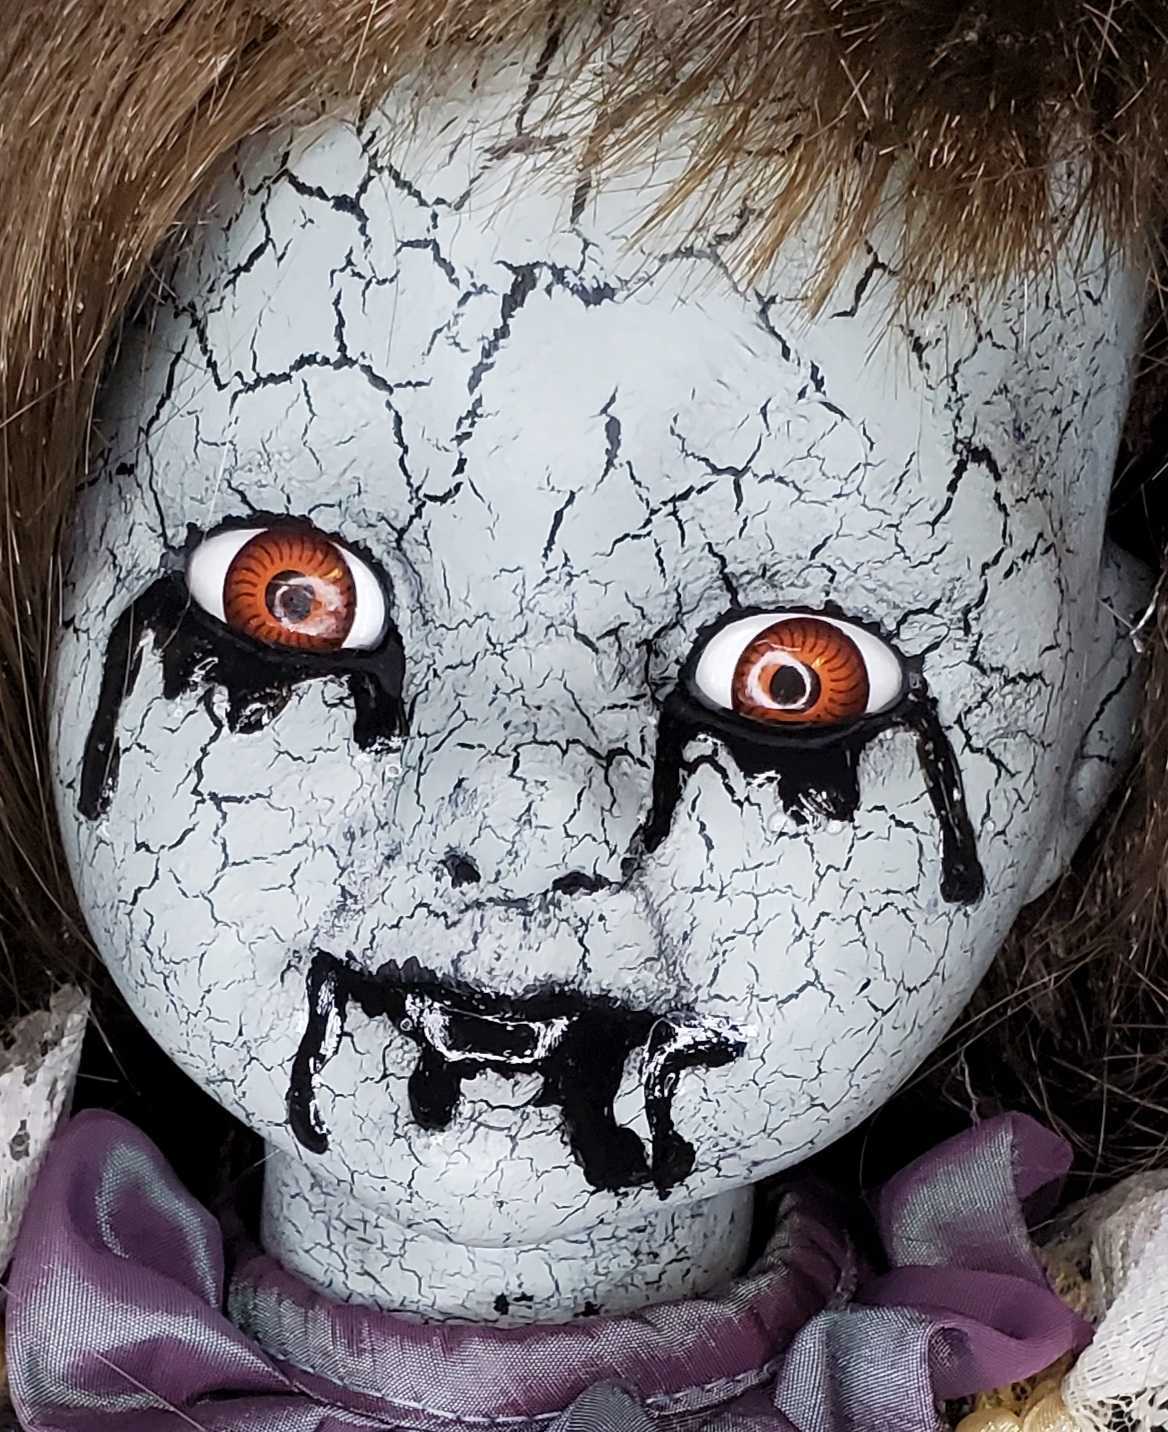
At this point you will add the details and dry brushing. Using the detail brush and a black acrylic paint start to fill in the lips and just a little around the eyes. Then paint on the black drips from the mouth to act as a guide when you add the epoxy for depth. I did not add drips to the eyes at this point (I decided to eyes after I mixed the epoxy and did not have time to go back and add the guides).
After the lips and eyes are done you will grab your flat brush and add a small amount of black paint and brushed on to a paper towel to remove as much paint as possible from the brush. Then carefully dry brush around the eyes, lips, nose. You can also add some dry brushing details between the bottom lip and chin around the ears and gently on the brow-line. This is what brings out the facial features.
After the head is done add black to the top of the arm and hands by putting a bit more paint on the brush and dabbing it around and then gently blending the dabs together by swiftly and lightly brushing back and forth. It should look similar to this when you are done.
Step 7:
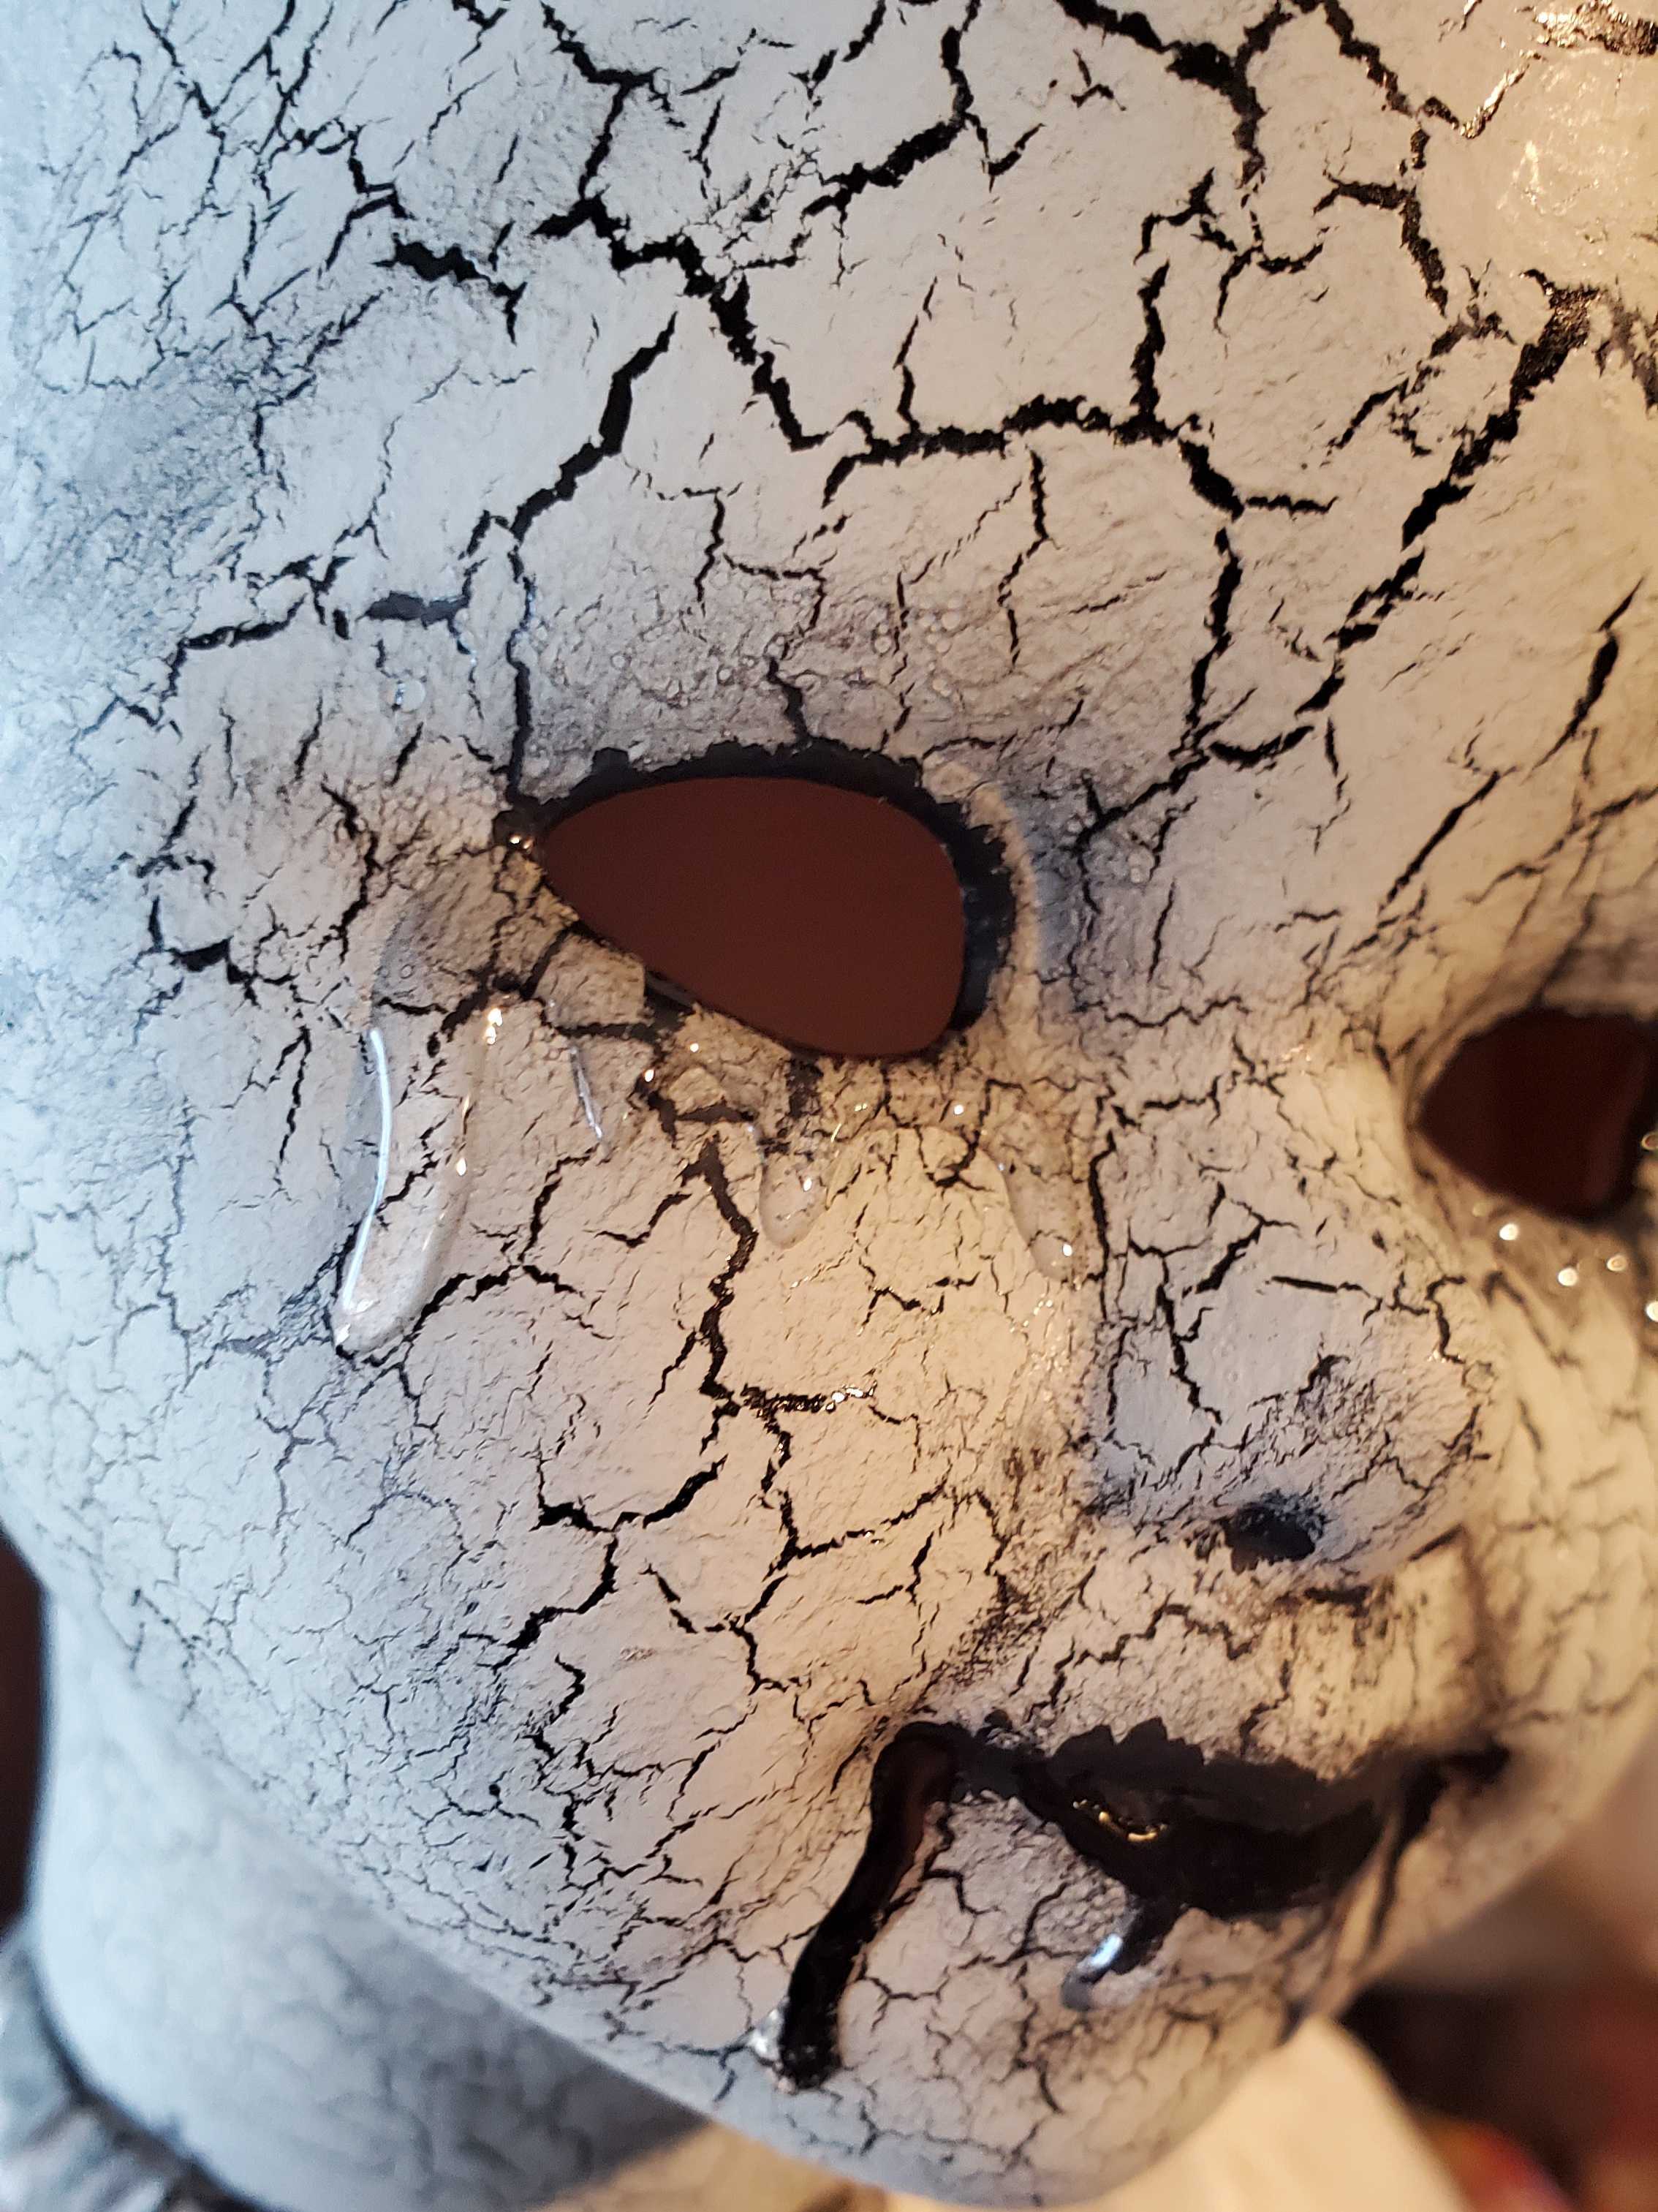
Adding tears and drool. This part will be time sensitive so be aware. Take your 5 minute 2 part epoxy and mix it together well. Once mixed take your tooth pick and get a small amount on the tip and then smooth it out across the bottom lip. Build that up by adding more epoxy to the toothpick and gently touching it to the doll. Once it is nice and thick using your toothpick pull the epoxy down following the guides you painted on adding more epoxy to the tip of the toothpick as needed. Then do the same under each eye. Build up a thick line across the bottom of the eye and gently pull it down in a tear pattern adding more epoxy as needed. The longer you take to do this the harder the epoxy will become to work with so try to move swiftly. Once you have finished adding the epoxy you will need to wait at least 24 hours to finish the rest of the project so the epoxy has time to cure. If it is not fully cured you will ruin your paint brush and it won’t be easy to hide the mistake on the finished doll (I learned that the hard way)
Step 8:
Once the Epoxy has cured use your detail brush and carefully paint the drool and the tears black. Hit it with the hair dryer until the paint is dry. At this point go over all the painted areas with your Mod Podge matte a couple of times. Hit it with the hair dryer in between coats to lessen the dry time if you want. Once the Mod Podge has dried you will add the gloss varnish to the drool and tears… and remember the more coats you add the more wet they will look. I personally added 5 coats of the Liquitex High Gloss Varnish.
I forgot to take a picture of this step before reassembling everything but it will look like this:
Step 9:
Once everything is dry you are good to reassemble the doll. If you removed the eyes just put them back in place using super glue or you could leave them off and that could look cool. Replace the wig using your hot glue gun. Run the glue gun across the front part of the wig cap (mesh under the wig) and secure it down. Then add a little more and secure and keep doing that until the wig is back in place. Put the outfit back on the doll and you are done.
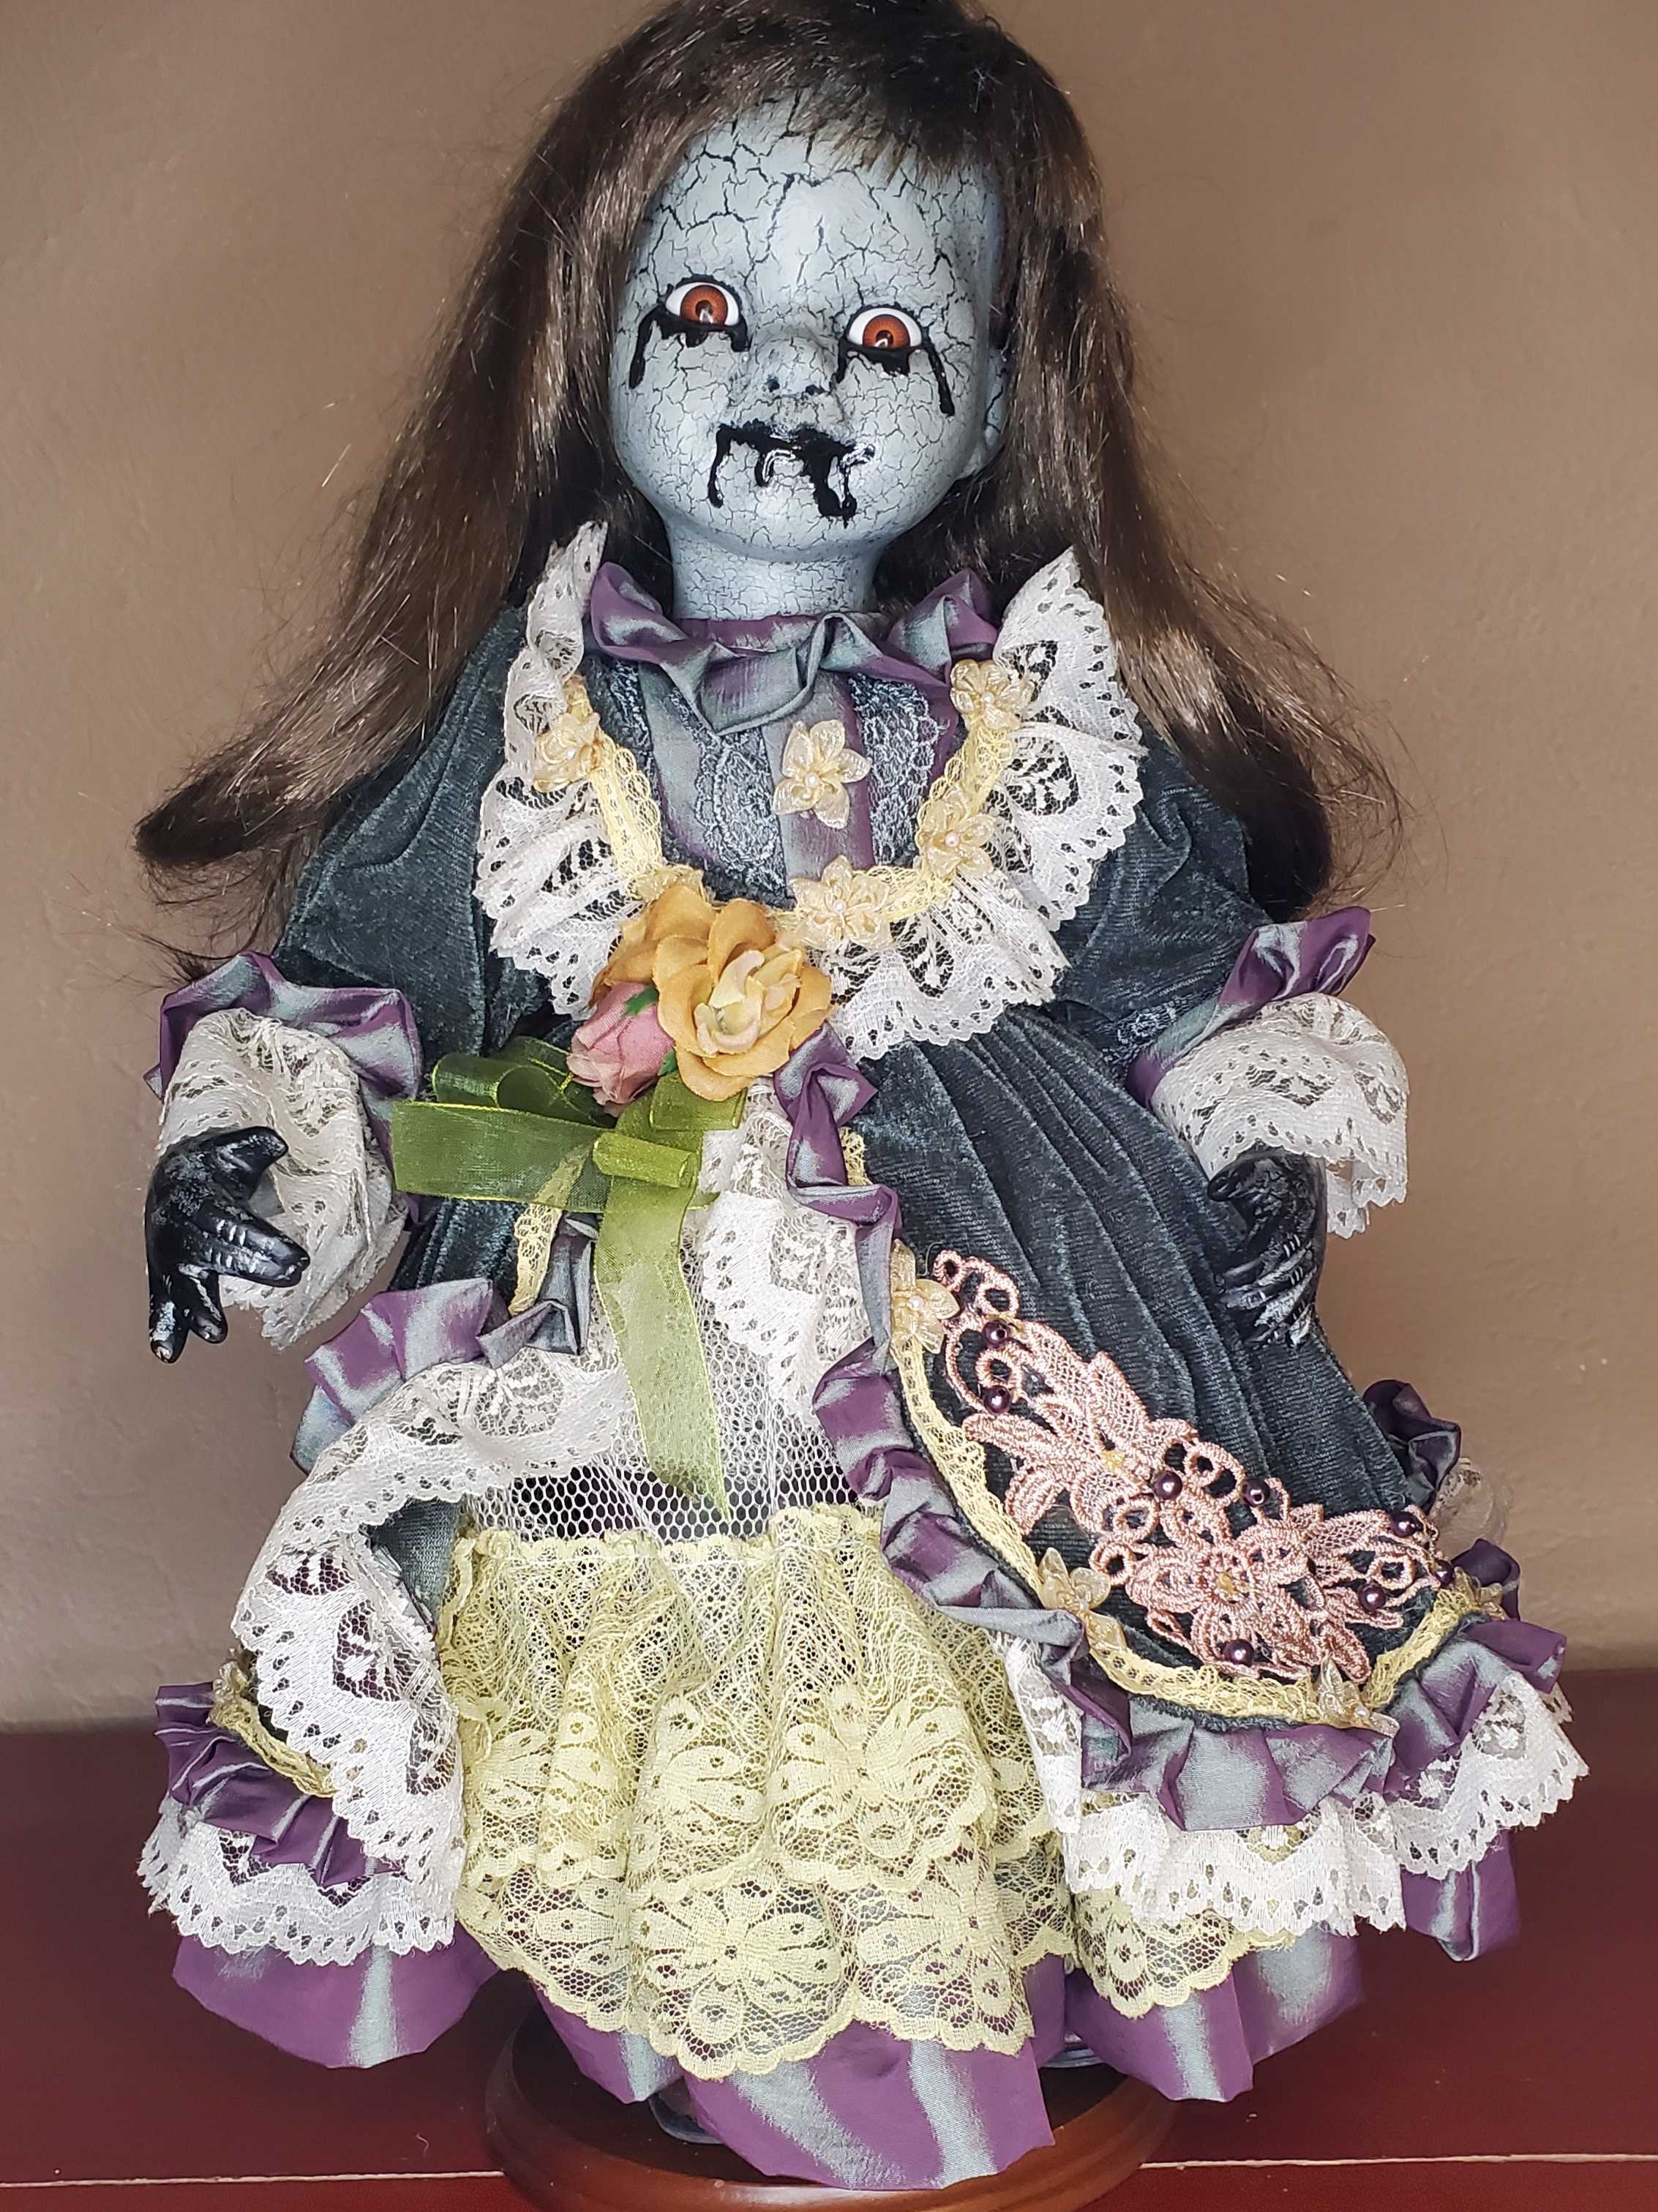
This doll was a bit more complicated but overall super fun to make. If you decide to tackle this project please post pictures below so we can all see them. If you took the time to read this thanks. If you have any questions let me know in the comments.
- 11 comments, 18 replies
- Comment
Forgot to include a picture of the paints and most of the supplies I used…
She’s awesome. I don’t think I have the patience to do one properly.
EVERYTHING IS AWESOME!
@Pony Me either and yet I’ll give it a shot. Properly is overrated.
@Pony @sammydog01 if you leave off the epoxy drool and tears and use a hairdryer whenever possible to dry things you could probably finish it in 3-4 hours
@Koolhandjoe @sammydog01 I did buy a doll… we’ll see if I wind up getting motivated to do anything with her.
@Pony @sammydog01 I have several large bins full of dolls waiting to be re-done… i normally just grab one and start… no plan… no direction… just a few items to start off the process… My motivation normally comes from… Holy crap a have a ton of stuff all over the table and my wife will be home soon i better get this done quick!
@Koolhandjoe @Pony I just went shopping at the craft store! Now I need to pick a doll.
@Pony @sammydog01 Can’t wait to see the results
Finally picked a doll. I don’t know why it was so hard. I’m starting with the black paint tonight.

@sammydog01 Those eyes are going to POP whatever you do! Have fun!
@mossygreen @sammydog01 Can’t wait for the reveal of the finished project
I finally worked up the nerve to try the crackle medium. It’s pretty cool. Tomorrow maybe her face.

@sammydog01 looks great!
@RiotDemon @sammydog01 Damn fine job… my first several attempts at crackle were not near that well done
@Koolhandjoe @RiotDemon You didn’t have a page of detailed instructions to follow. Thanks for that!
I’m at the wait 24 hour stage. I guess I should start on something else.

By the way I used masking tape to cover the eyes. I thought I was so smart. Then it peeled off a big chunk of her face when I took it off. Fortunately it was under her eye so I could stick it down with black paint and cover it with epoxy. Guess I won’t do that again.
@sammydog01 extremely well done… impressive!!!.. you can use poster tac to cover the eyes… or remove the eyes by using a hammer and something with a blunt tip… just don’t tap so hard it breaks the porcelain
Amazing! She beautifully creepy
@ShandaSunshine thank you
Excellent directions and outcome!
How big is your doll collection? Monsterfied and not?
@callow i have just a few monsterfied… i sell or give most of them away… but i have a backlog of about 50 to do.
Well this should be fun.
@Koolhandjoe I cut a doll’s face off and have to say it was fun. I tried to sand down the edges with one of the grinders that came with my fake dremel but the porcelain was harder. Do you have a recommendation for something I can use on porcelain?

@sammydog01 i use the same cutting wheel that i cut the face of with… just go over it slowly it will smooth out real fast… the just use a heavy grit sandpaper to do the rest
@Koolhandjoe Thank you!
This sure was fun! I found the crackle to be easier than the dry brushing. I may be using it a lot. Thanks for the instructions!

@sammydog01 superb job on the crackle effect… and the ooze is spot on… looks so good!
Wow! I love seeing the before and after photos. Thanks for the instructions @Koolhandjoe